Architectural Rendering Examples: What to Upload at Each Design Stage
See what to upload at concept, schematic, design development, and client-presentation stages, with real source/output examples from a Render a House workflow.

Architectural rendering examples are only useful when you can see what the render started from. A polished exterior render, a loose sketch, a cleaned-up drawing, a model view, and a shared client review all answer different design questions.
This guide shows concrete AI architectural rendering examples by design stage. Each stage pairs the source input with the kind of output it can support, so you can decide what to upload to Render a House, what to add in the prompt, and when a fast 2D upload is enough versus when you should move into 3D Preview.
Quick guide: what to upload
| Design stage | Best starting input | What the example should prove | Add in the prompt |
|---|---|---|---|
| Concept design | Sketch, massing screenshot, rough facade idea, or precedent-style reference | Mood, form, material direction, and broad options | Atmosphere, building type, material family, time of day, and whether the design can change |
| Schematic design | Clean floor plan, elevation, section, or simple model view | Layout logic, openings, scale, and the first believable visual direction | Which geometry to preserve, where the camera should sit, and what finishes are missing |
| Design development | Model screenshot or 3D model file | More controlled materials, facade language, site fit, and repeatable views | Exact material changes, context, camera angle, and fidelity constraints |
| Client presentation | Best previous render, saved view, or 3D Preview camera | A consistent view set that can support a decision | What must stay fixed, what can be improved, and which view is most important |
Render a House supports image uploads such as PNG, JPEG, and WebP, plus 3D model files such as GLB, GLTF, and OBJ. For image uploads, a clean export around 2000 to 3000 px on the longest side is usually easier to work with than a huge, cluttered file.
Concept design example: sketch to visual direction
At concept stage, the best architectural rendering example is not the most precise one. It is the one that helps you test a direction quickly.
Upload a hand sketch, a massing screenshot, a simple facade idea, or a rough view from your modeling tool. The goal is to explore proportion, atmosphere, and visual direction before the design is locked. If the input is loose, treat the render as an option, not as documentation.
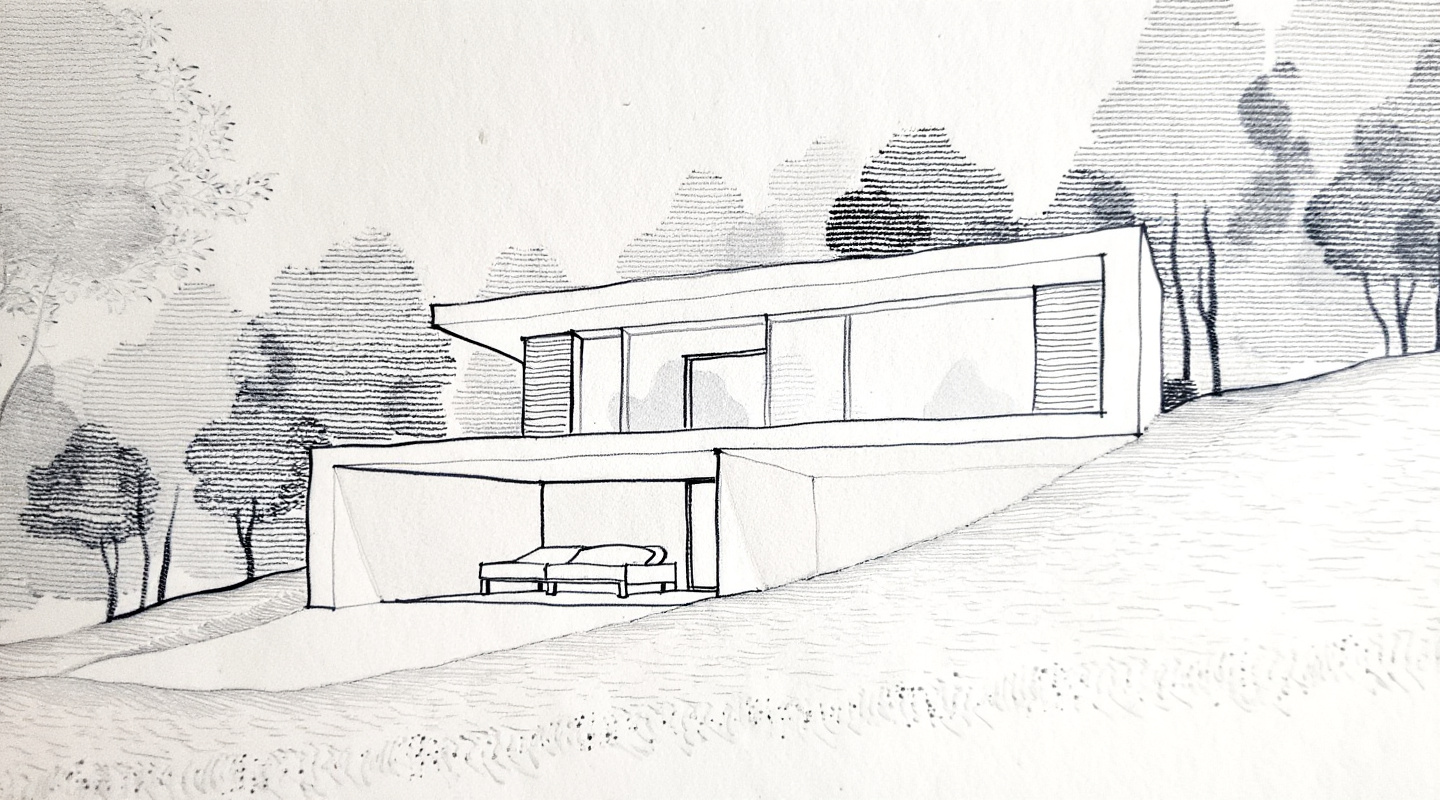
This example proves the concept-stage job: turn a loose drawing into a credible direction without pretending every facade detail is fixed. The sketch gives the AI massing and composition; the prompt supplies the material direction, light, and mood.
Photorealistic concept render of a small contemporary house based on this sketch, warm timber and light stucco, soft afternoon light, simple landscape, keep the main massing but allow facade details to evolve.
Use this kind of example when you need three or four visual directions for a client conversation. Do not use it when exact window positions, material specifications, or site constraints must be preserved.
If you are starting from a hand drawing, the sketch-to-render workflow gives a more detailed setup path.
Schematic design example: drawing to believable render
At schematic stage, the input carries more design logic. A floor plan, elevation, section, or clean exported view can help the AI understand layout, openings, and proportions. But it still cannot infer everything.
A drawing tells the AI where the main design information sits. It does not automatically define the exact ceiling height, facade treatment, material palette, furniture density, or light direction unless you add those details.
This example proves the schematic-stage job: preserve the drawing logic, then supply the finishes and light that the drawing cannot show by itself. The more specific the source drawing is, the more direct your prompt can be about what should stay fixed.
Bird's-eye architectural rendering from the uploaded drawing, preserve the room relationships and main openings, warm oak floors, off-white walls, simple contemporary furniture, soft daylight, clean client presentation style.
Use this example when you want a fast visual from a 2D drawing. If the first output misunderstands the overall composition, generate a new version. If one material, tree, wall, or furniture piece is wrong, use a local edit instead.
For a deeper walkthrough, use the floor plan render workflow.
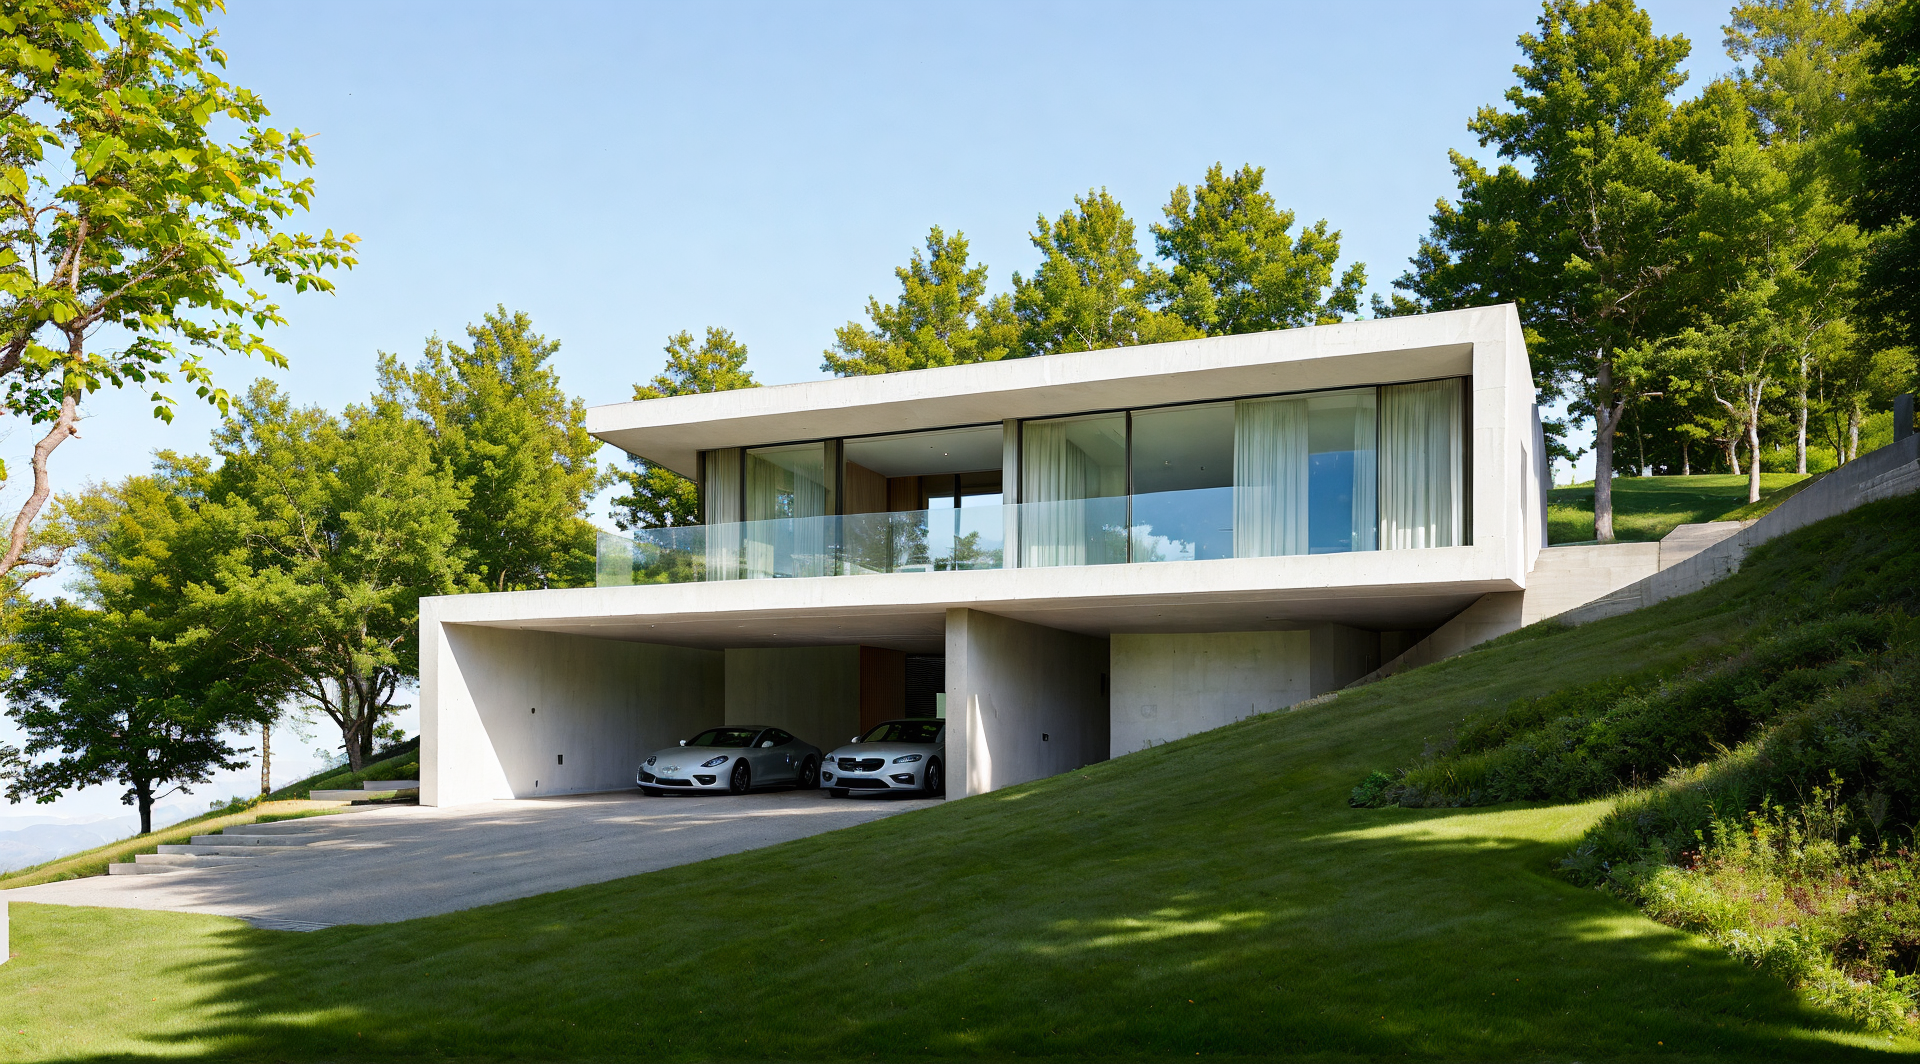
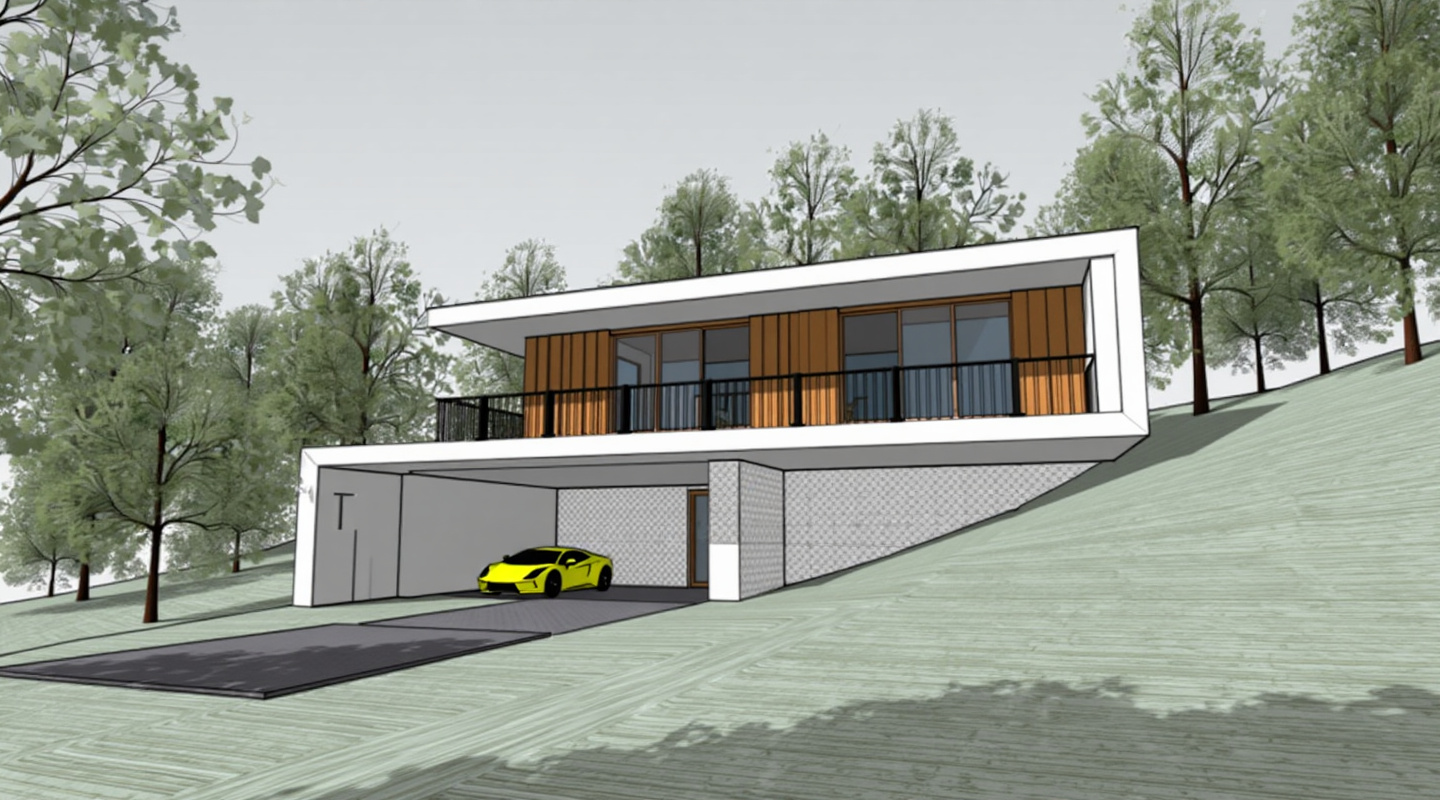
Design development example: 3D Preview to site-specific render
During design development, you usually need more control. The building has a clearer shape, the facade language matters, and the camera angle may need to repeat across options.
- Upload a model screenshot when you want a fast restyle from a view you already composed.
- Use 3D Preview when you have a GLB, GLTF, or OBJ file and the project needs real site context or a repeatable camera.
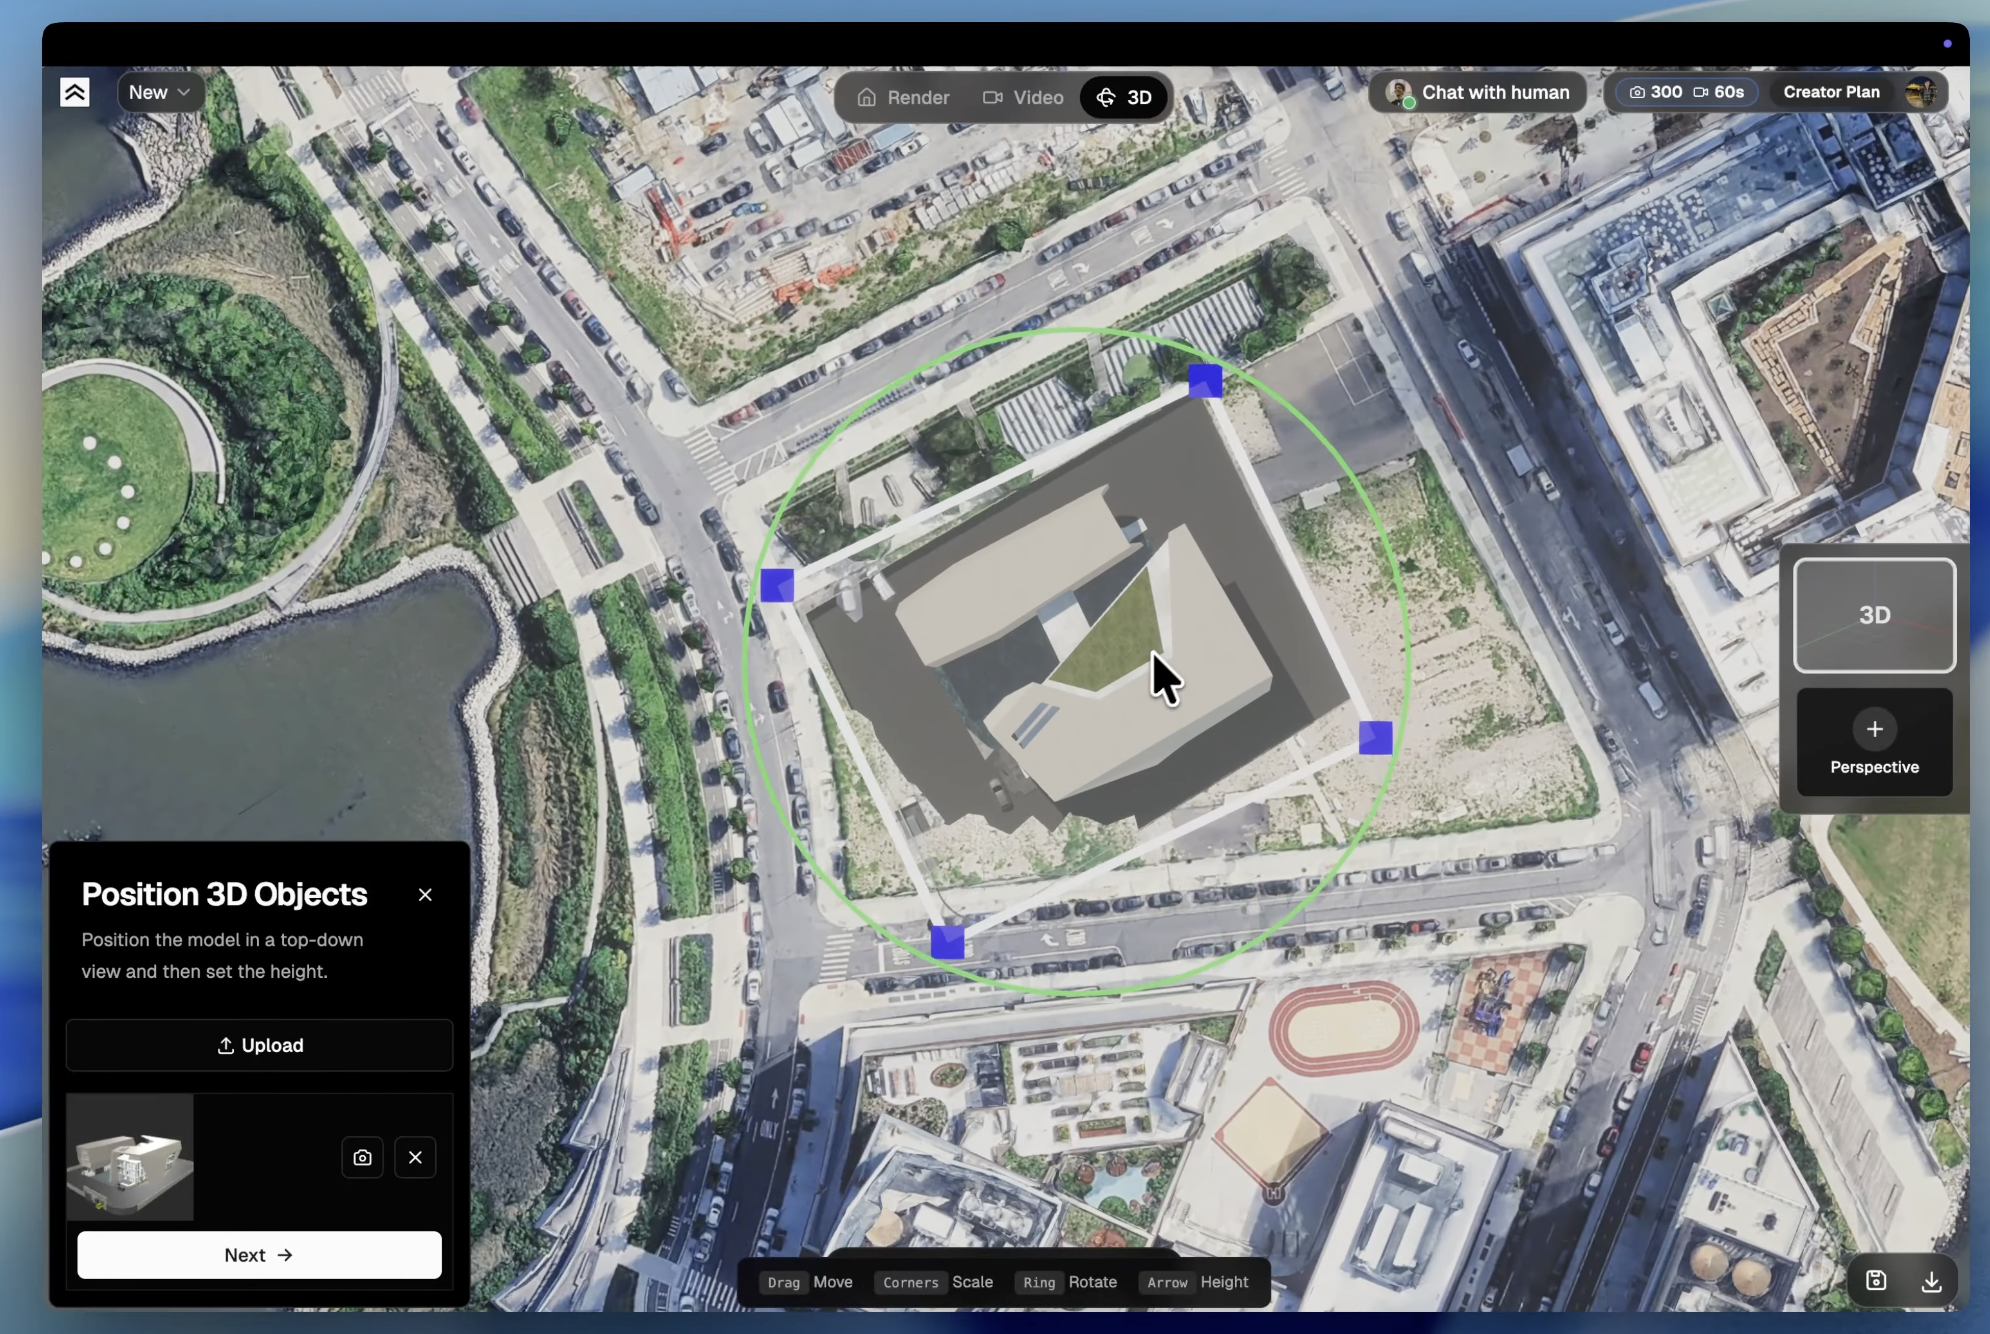
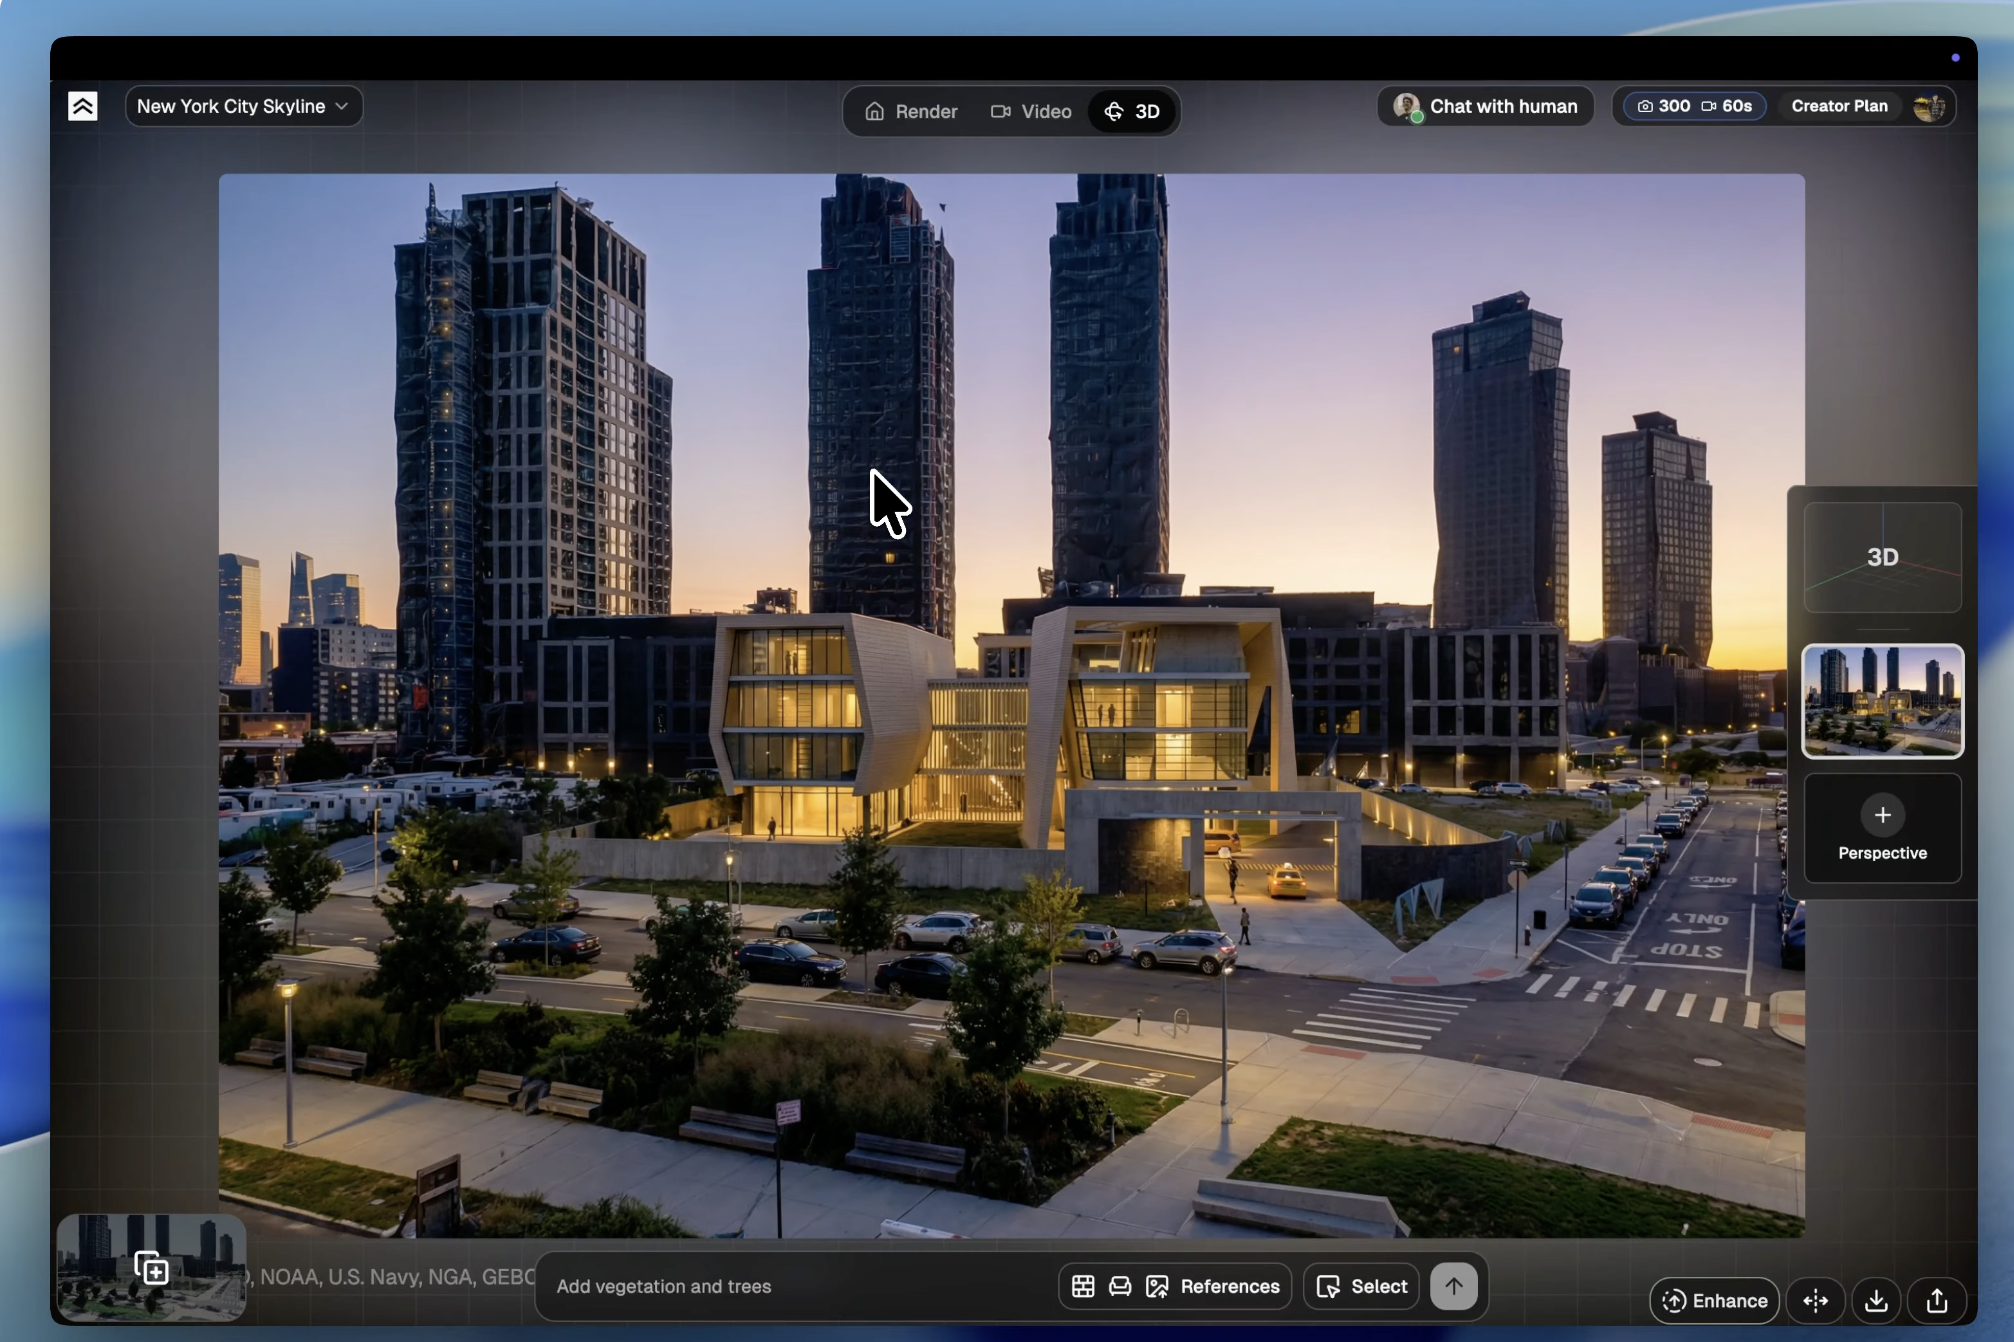
This example proves the design-development job: use a positioned 3D Preview scene when the building geometry is clearer and the render needs tighter material, camera, and site control. The source input is no longer just a sketch or a drawing; it is a model placed on satellite terrain before rendering.
Realistic exterior render from this model view, keep the geometry and window positions unchanged, replace white massing materials with pale brick, dark metal frames, and warm interior glow, overcast afternoon light.
3D Preview is better when the site matters. It lets you position a 3D model on real satellite terrain, choose the camera, and render from that exact viewpoint. Use it when the building needs to sit on a specific street, plot, skyline, or landscape.
If you are starting from SketchUp, use the SketchUp to render workflow to decide when a screenshot is enough and when exporting a model file is worth it.
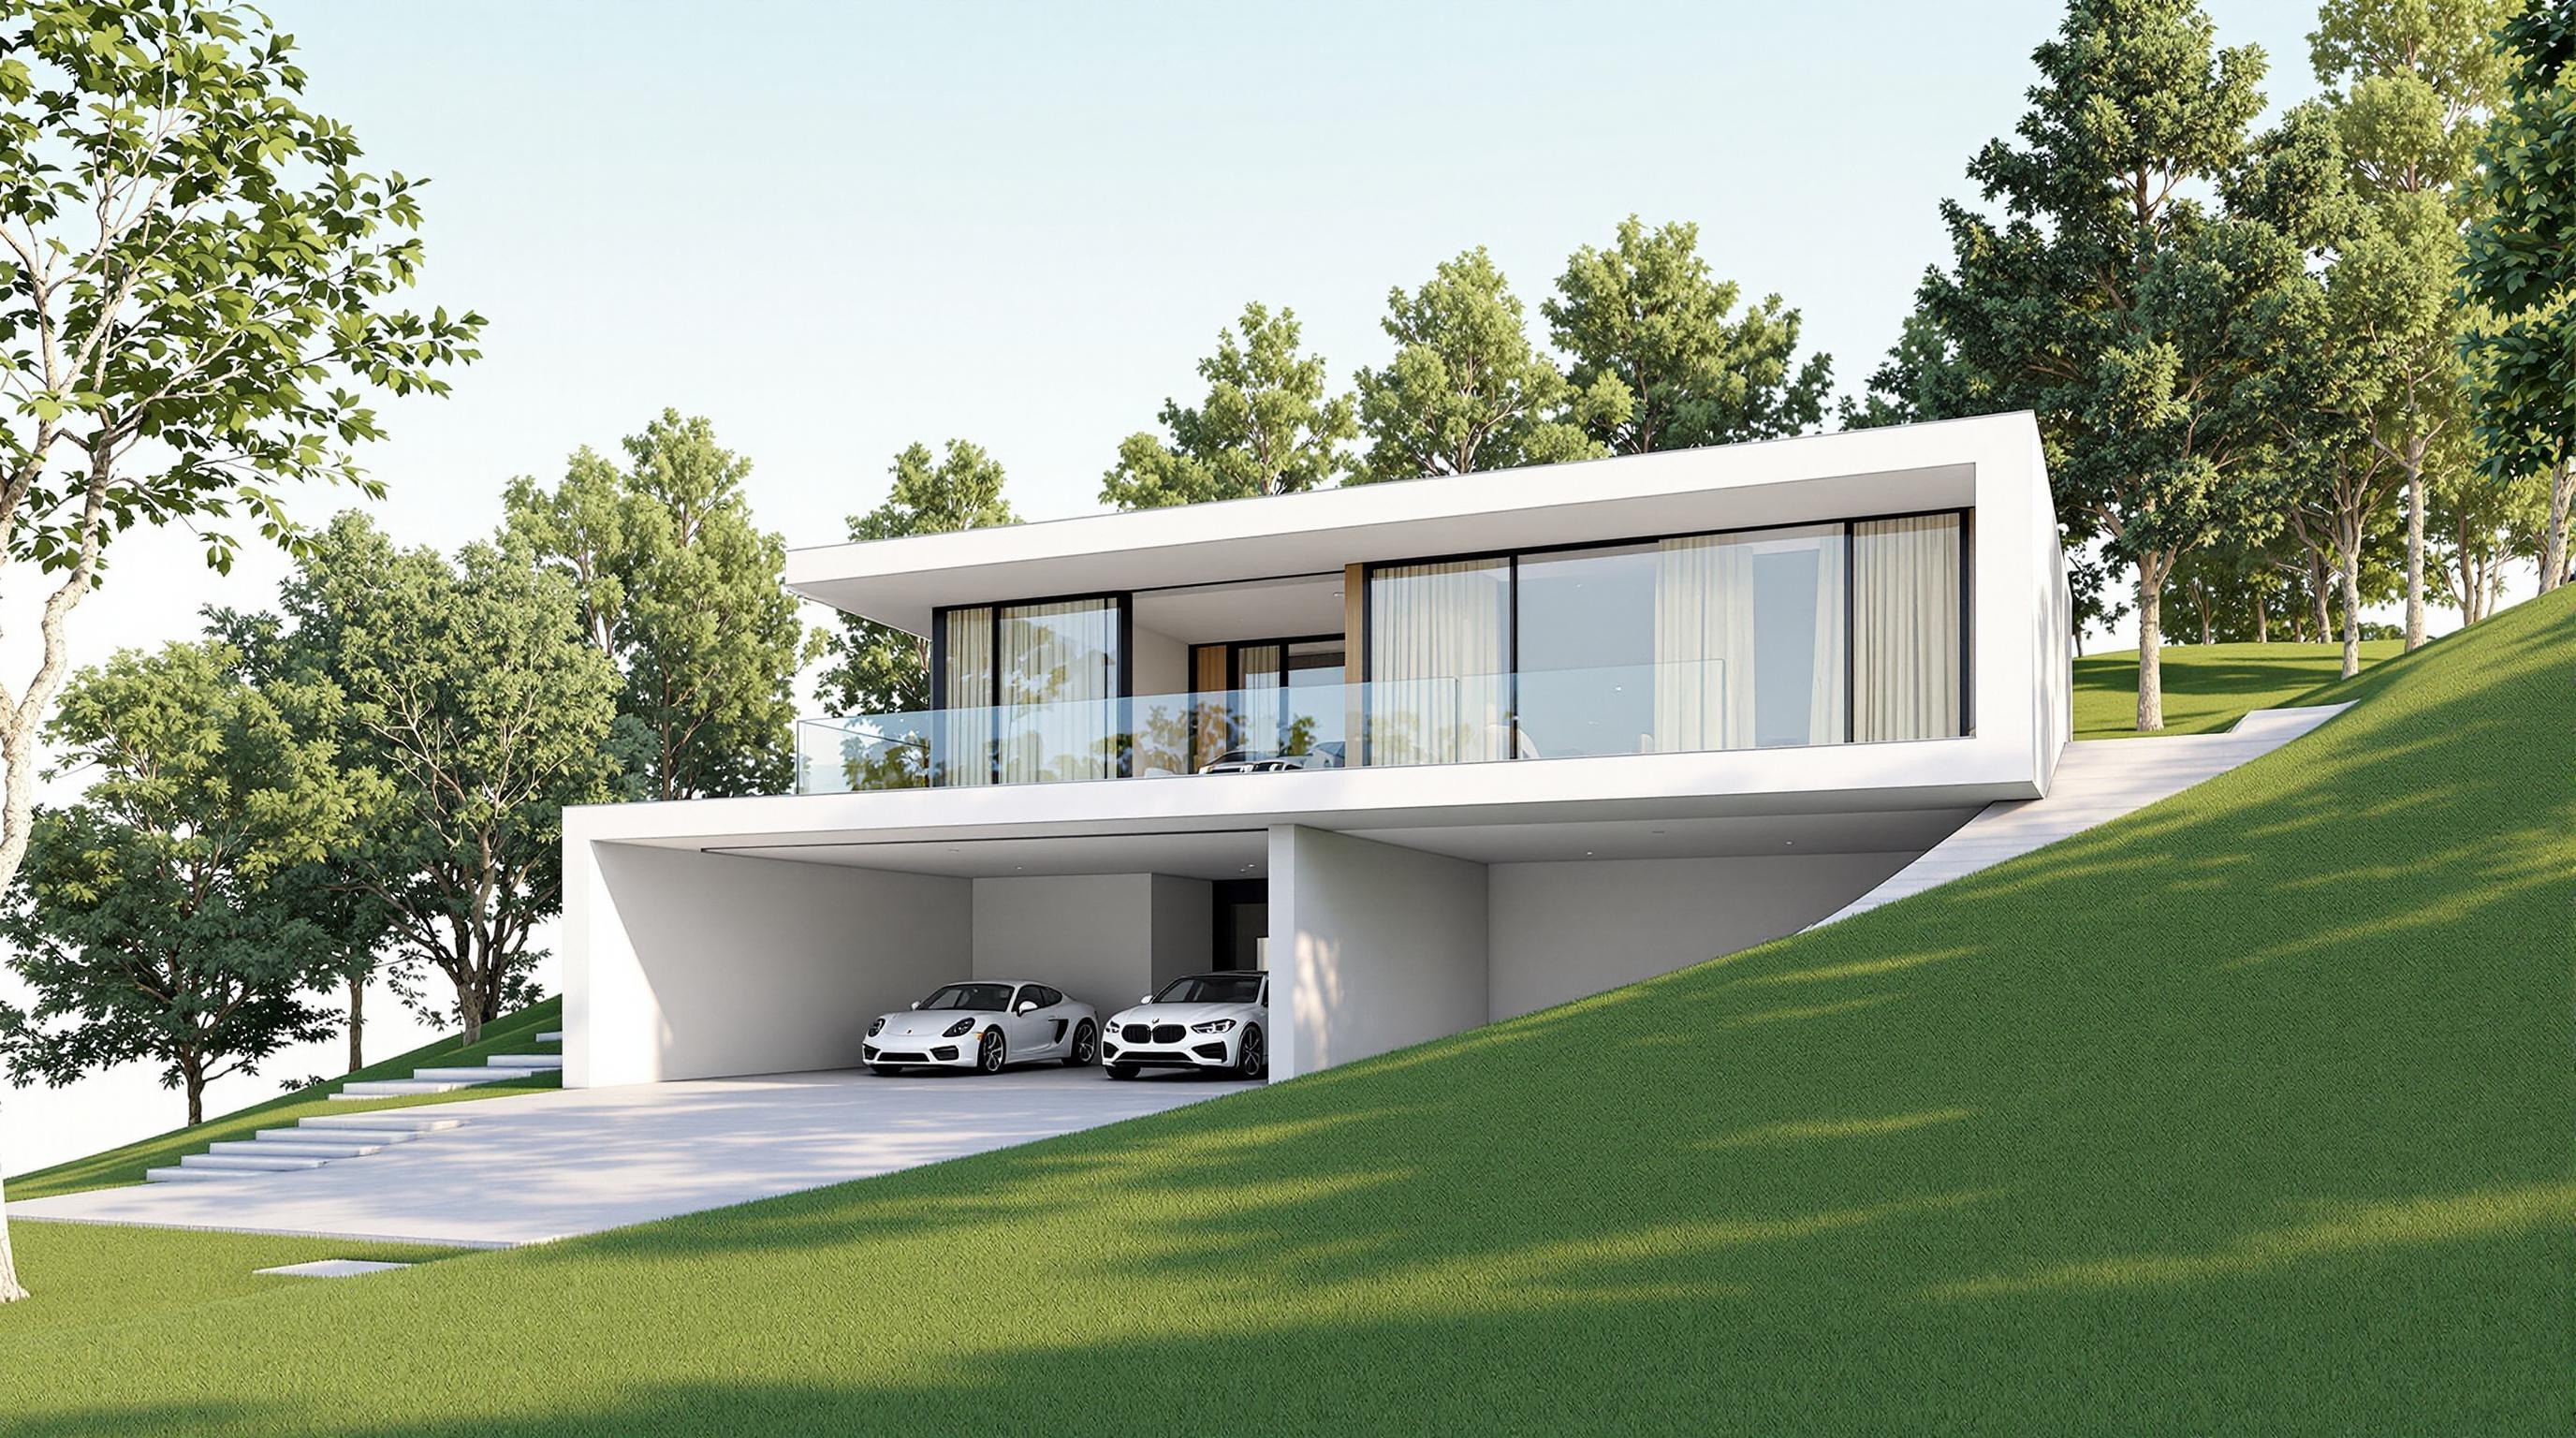
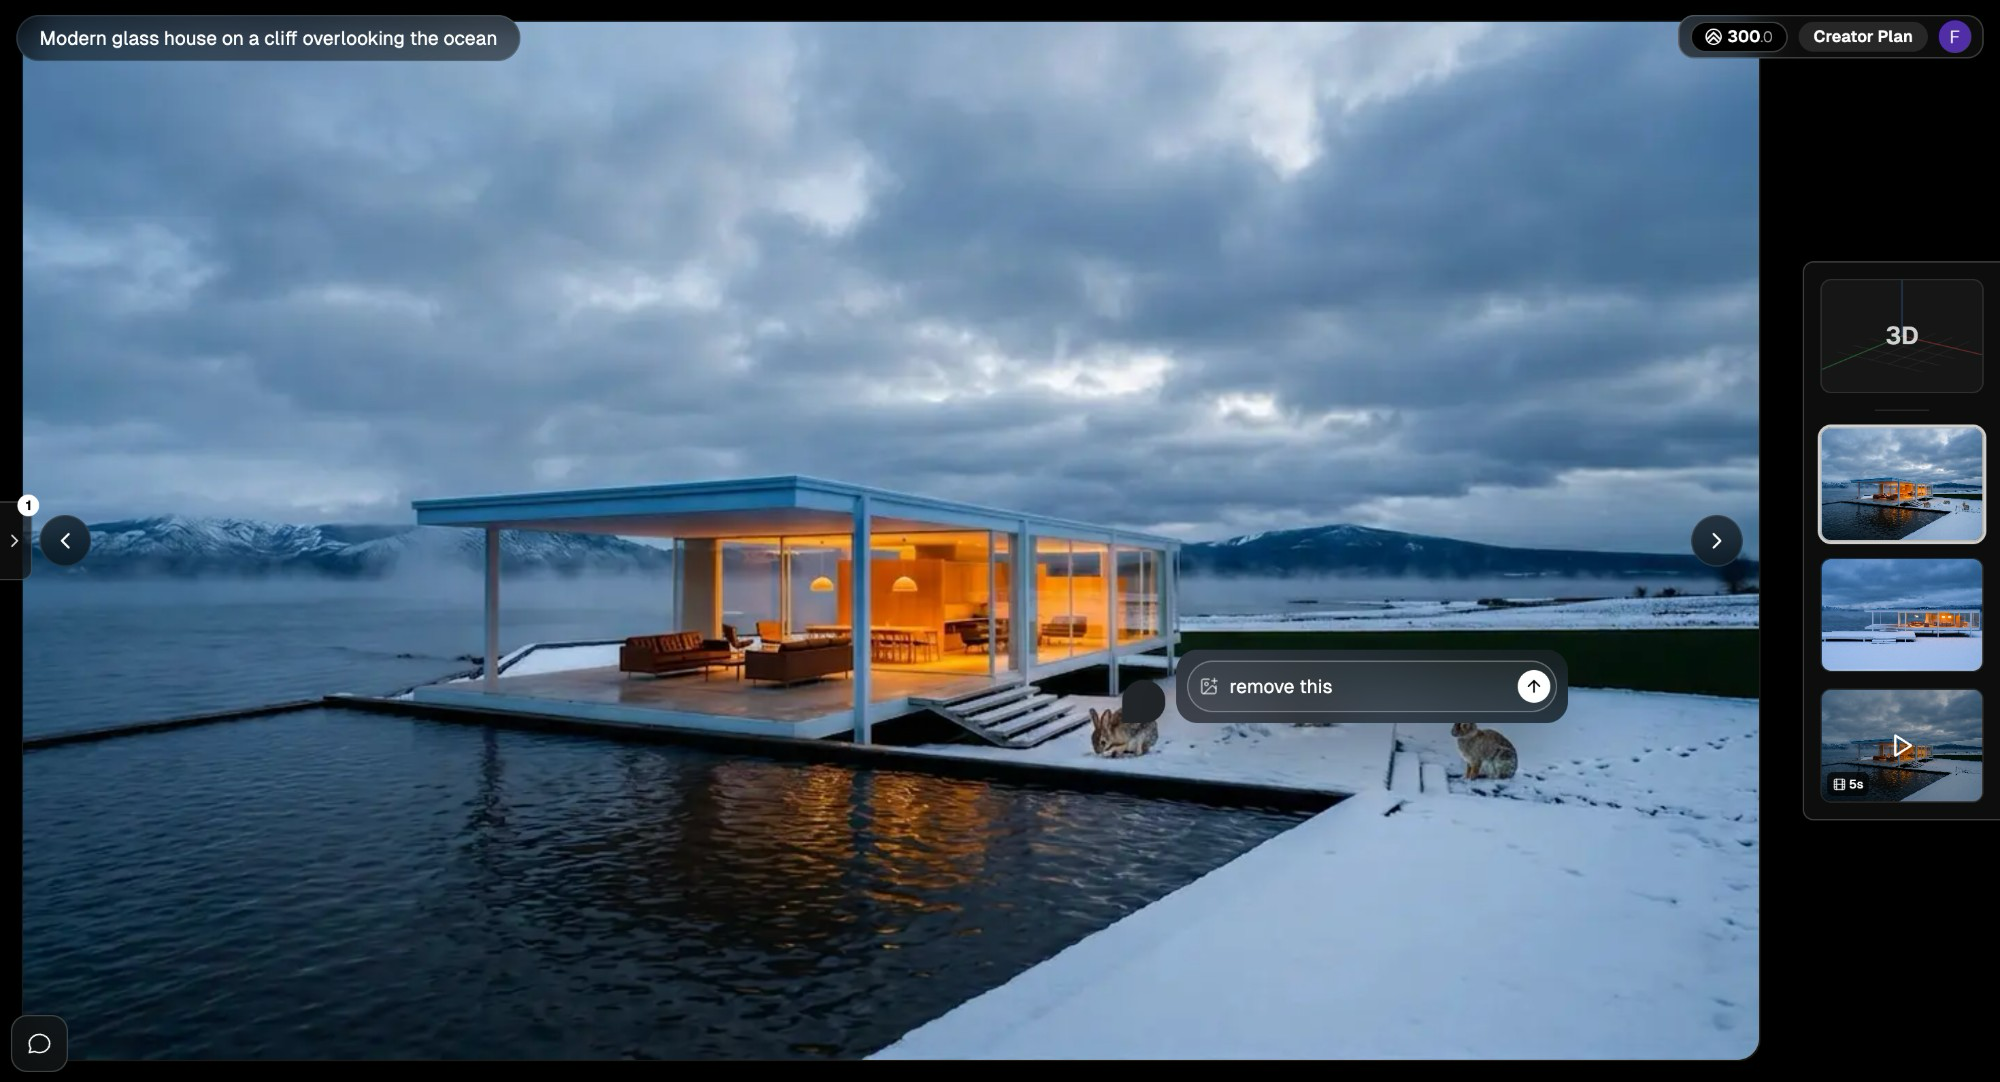
Client presentation example: render to review-ready view
For client presentation, one strong render is useful, but a controlled review flow is better. The example should show the same project through views that answer different questions: front approach, interior moment, rear garden, aerial context, or material detail.
Keep those views in one project when they describe the same building. Render a House organizes work by project, view, and render history, so you can keep related angles together instead of starting over for every image.
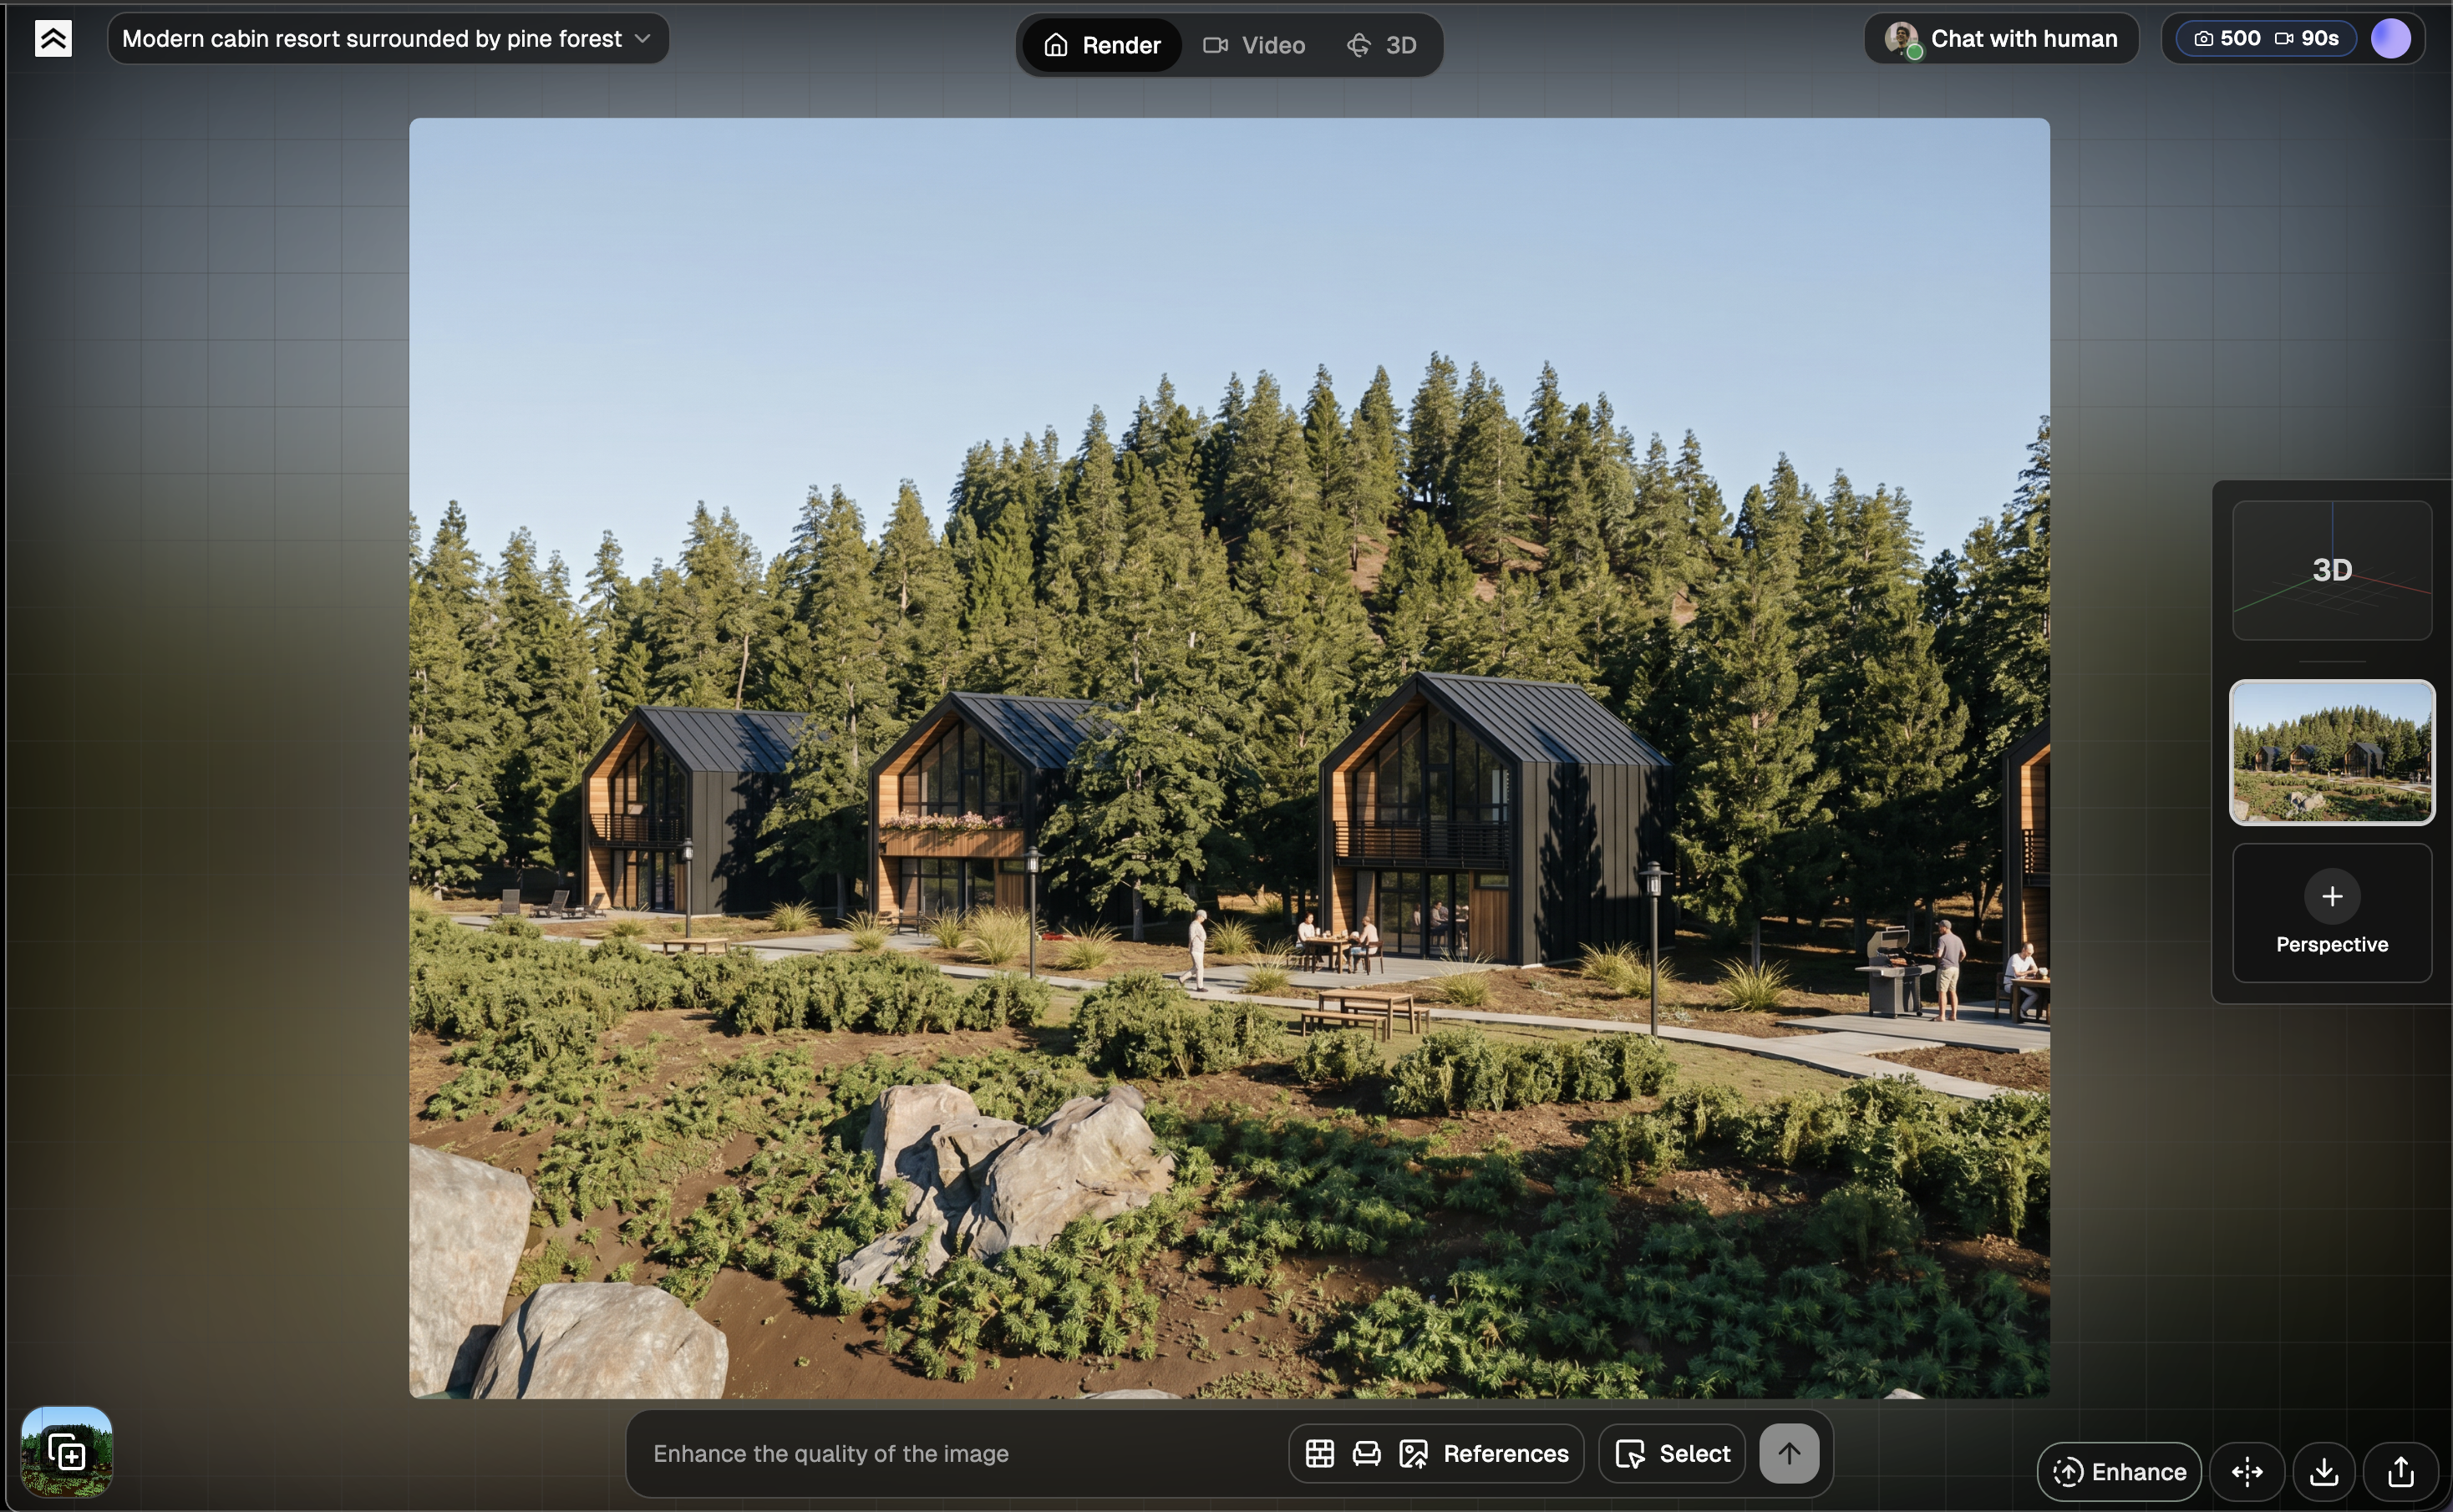
This example proves the presentation-stage job: keep approved geometry stable while improving polish, then make the final view easy for a client or teammate to review. At this stage, the rendering example is not just an image; it is part of the decision workflow.
Client-ready exterior render from this saved view, keep the approved facade geometry, window layout, roofline, and material palette unchanged, improve realism, landscaping, soft evening light, and presentation polish.
If you need consistent lighting and materials across several perspectives, Copy Render can help carry the look from one view to another. If the client needs to review the work asynchronously, use Share after you have narrowed the set to the strongest options.
How to choose between a 2D upload and 3D Preview
Use a regular 2D upload when speed matters and the source is a sketch, plan, elevation, screenshot, or existing render. This is usually the best path for early examples, fast concepts, and local refinements.
Use 3D Preview when precision matters more than speed. It is the better path when you have a model and need real-world context, repeatable camera positions, or several related views from the same design.
- If the question is "What could this become?", start with a 2D upload.
- If the question is "How does this sit on this site from this angle?", use 3D Preview.
Prompt examples you can adapt
Sketch to concept render
Photorealistic concept render based on the uploaded sketch, compact modern cabin, dark metal roof, warm wood cladding, large front glazing, misty morning setting, keep the basic massing but allow design details to improve.
Drawing to schematic render
Architectural rendering from the uploaded drawing, preserve the main proportions, openings, and roofline, add warm neutral materials, simple planting, soft daylight, and a clean client presentation feel.
Model screenshot to exterior render
Realistic exterior architectural render from this model screenshot, keep geometry and proportions unchanged, improve materials with light concrete, black metal frames, natural planting, soft overcast light.
3D model to site-specific presentation view
Client-ready exterior render from this 3D Preview camera, keep the model position and camera angle, natural terrain and street context, late afternoon sun, realistic glass, landscaping, and warm interior light.
Common mistakes to avoid
Uploading a noisy file
Construction notes, dense dimensions, title blocks, and unrelated layers can distract from the design information that matters. Export the cleanest view that still explains the building.
Expecting a drawing to know the finishes
A drawing explains geometry. It does not specify the visual mood. Add materials, light, camera direction, and fidelity constraints in the prompt.
Asking for strict fidelity and maximum style at the same time
If you need the AI to preserve geometry, say so directly. A highly stylized prompt gives the model more freedom to reinterpret the design.
Restarting the project for every angle
If several views belong to the same building, keep them together. Use views/perspectives inside the project so the visual history stays organized.
FAQ
What is the best file type for an architectural rendering example?
For 2D uploads, use PNG for crisp drawings and JPEG or WebP for screenshots and image-like exports. For 3D Preview, use GLB, GLTF, or OBJ.
Can a floor plan become a realistic exterior render?
It can become a useful concept image, but a floor plan alone leaves many exterior decisions undefined. Add facade style, materials, camera direction, and context in the prompt. If exact exterior geometry matters, use a model or 3D Preview.
Do I need a full 3D model before using AI rendering?
No. Sketches, plans, elevations, and screenshots can all produce useful examples. A 3D model becomes more important when exact camera control, site context, or repeatable presentation views matter.
Start with the source you already have
The best architectural rendering example depends on the design question in front of you. Early on, upload the rough sketch or plan and explore. As the design gets more specific, move toward cleaner exports, model screenshots, or 3D Preview.
If you already have a file ready, start a new Render a House project and test the fastest path first. You can always generate another version, make a local edit, or move into 3D Preview when the view needs more control.
Keep reading
Related guides and comparisons

SketchUp to Render: How to Turn a 3D Model Into a Photorealistic AI Render
A practical SketchUp-to-render workflow for architects: when to upload a screenshot, when to export .glb for 3D Preview, plus clean-export, styling, and refinement tips.

Render Variations: How to Explore Multiple Design Options From One Upload
Learn how to make render variations in Render a House: vary time of day, location, style, and materials, and give clients clear options.

AutoCAD Rendering Workflow: How to Turn an AutoCAD View Into a Realistic AI Render
Learn when to use AutoCAD's native render, when to export a clean image, and when to switch to 3D Preview for faster presentation-ready visuals.
