
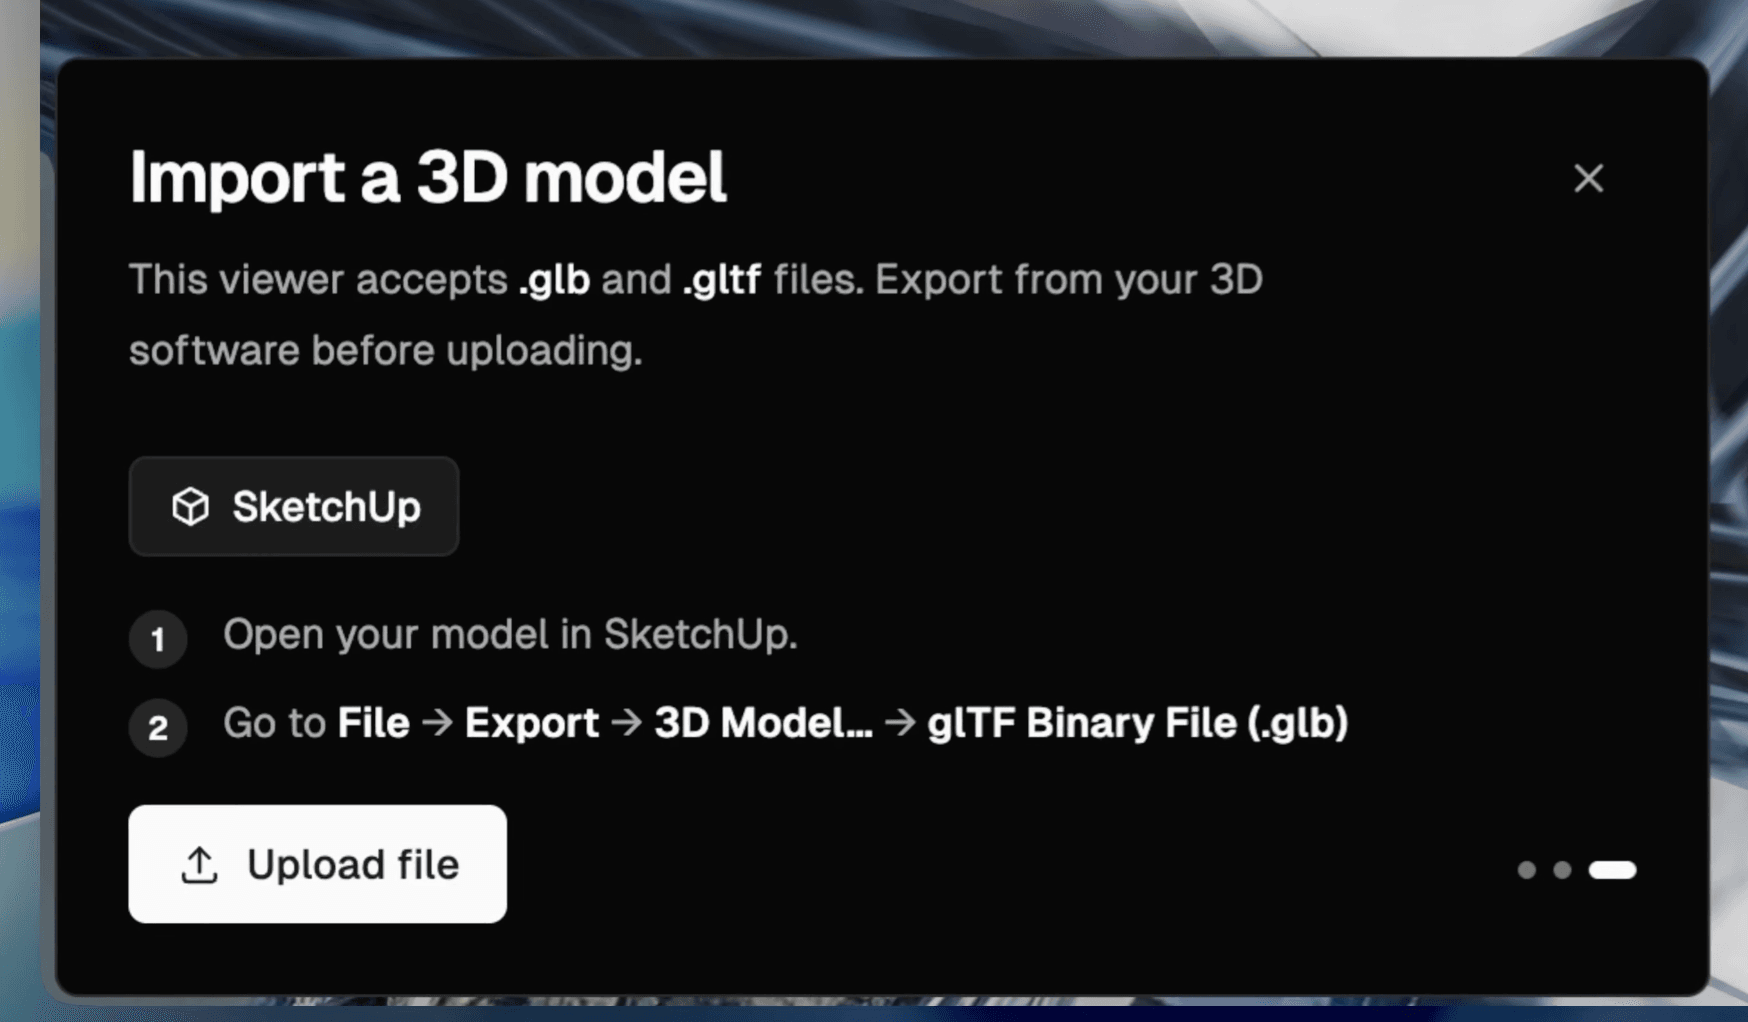
Upload
Import a supported model
Open signed-in 3D Preview and upload a GLB, GLTF, or OBJ model exported from your source design tool.
Bring a GLB, GLTF, or OBJ model into Render a House 3D Preview, place it in a model-and-scene workflow, save the camera angles you need, and turn those views into architectural renders.
This viewer path is built for presentation workflow, not file conversion, native CAD/BIM viewing, exact measurement, structural analysis, or construction-ready output.
3D Preview at a glance
A generic 3D model viewer is useful when you only need to rotate a file. Render a House 3D Preview helps you review the model, choose presentation angles, and hand saved views into rendering.
Upload
Open signed-in 3D Preview and upload a GLB, GLTF, or OBJ model exported from your source design tool.
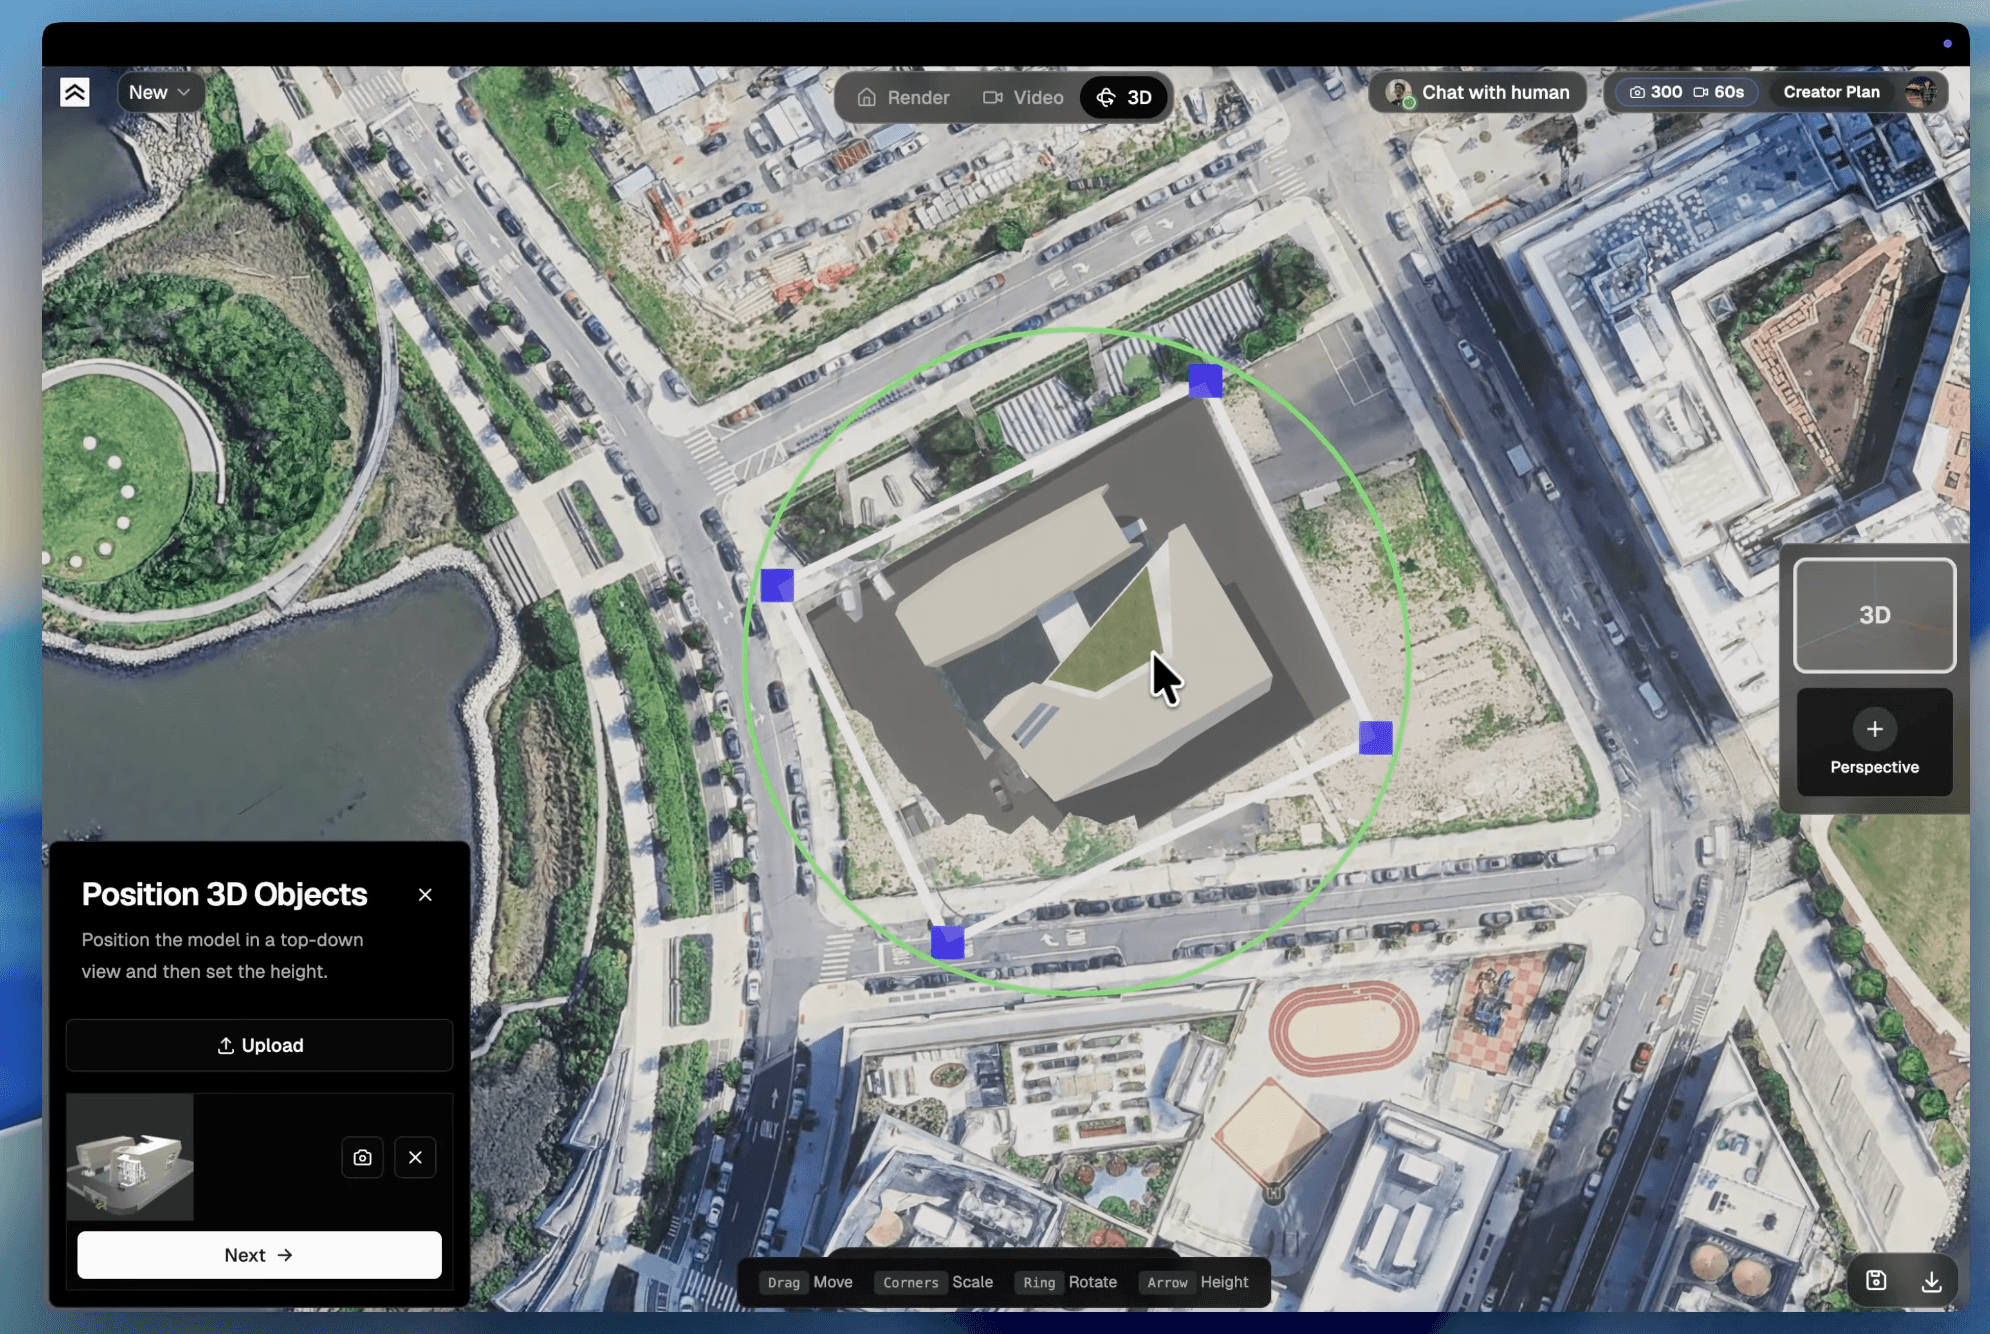
Place
Move, rotate, scale, or raise the model until the visual placement reads correctly for the view.
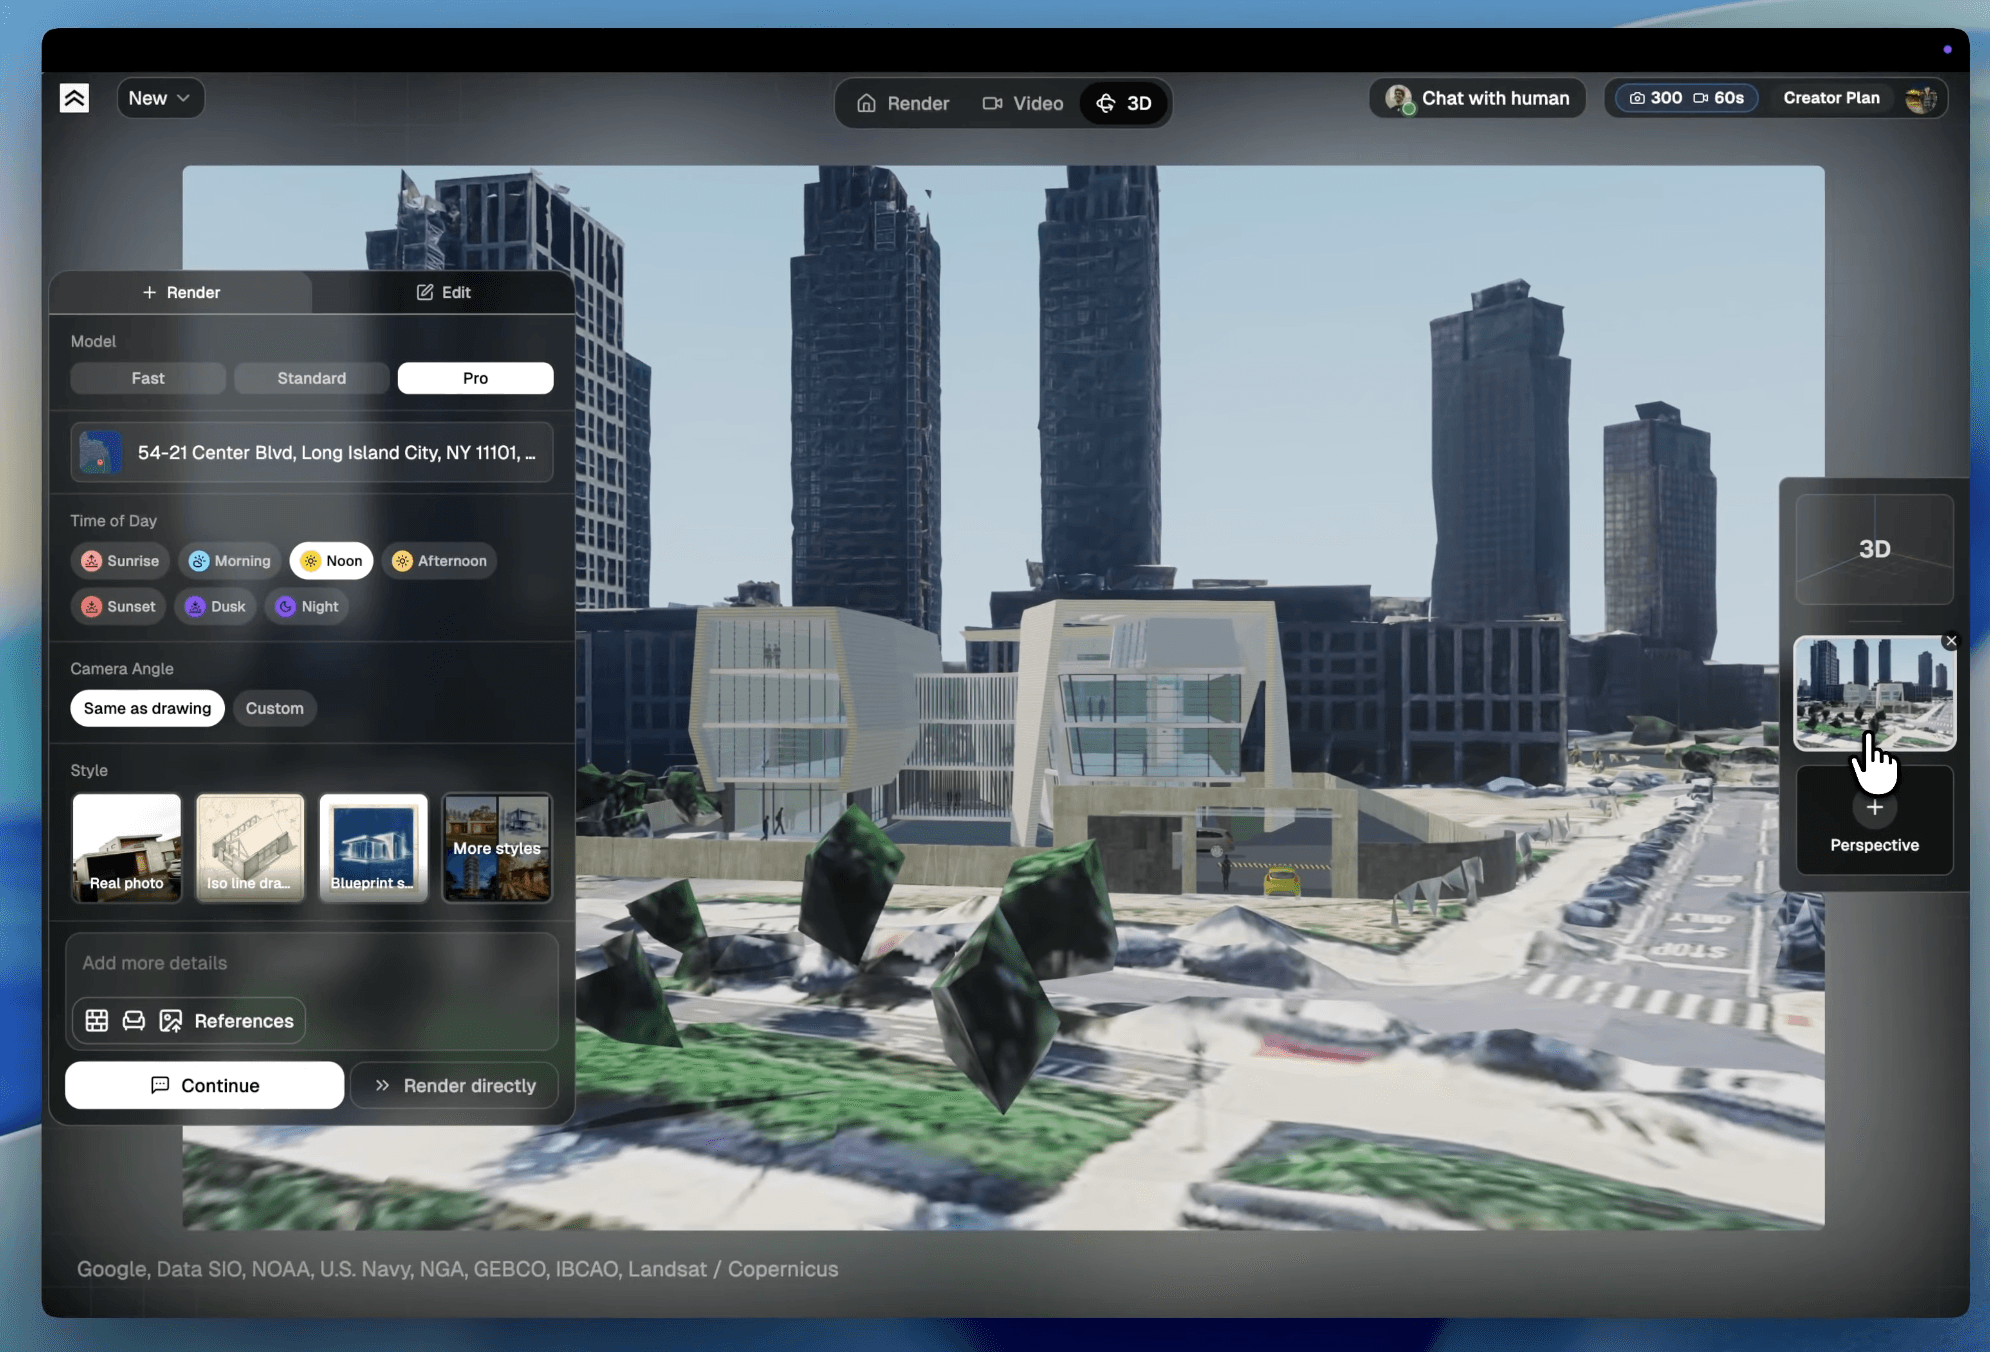
Render
Save the camera as a Perspective, then continue into render settings with that 3D scene as the base.
Use the viewer step to decide whether the source model, placement, and camera are good enough for a visual render pass before spending time on final image direction.

Start with a GLB, GLTF, or OBJ file. Native CAD and BIM files need to be exported to a supported model format before this handoff.
Use 3D Preview to move, rotate, scale, or raise the model until the visual placement works for the presentation view.
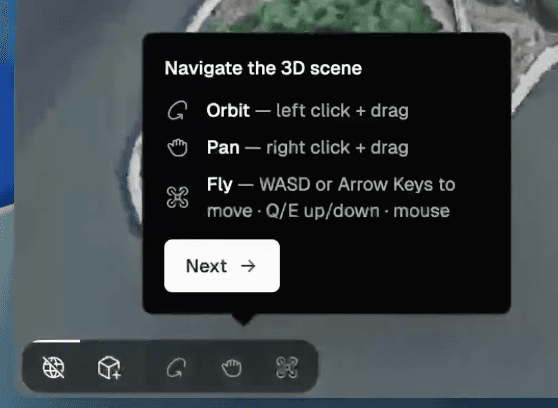
Move around with orbit, pan, and fly controls. Save useful camera angles as Perspectives inside the project.
Open the saved Perspective in render settings, keep the camera framing when needed, then generate and refine the image.
The best file is the one your source design tool can export cleanly. GLB is usually the simplest handoff because it can keep model data and textures together. GLTF and OBJ are also useful, but check the imported model before relying on it for a render.
Recommended for most uploads because the model, materials, and textures can travel together in one binary glTF file.
Useful when your export stays in the glTF family, but related texture and material files may need to stay together.
A practical fallback for older modeling tools. Review materials and textures after import because they may depend on companion files.
Native SKP, RVT, DWG, DXF, IFC, STEP, and similar project files are not direct uploads on this viewer page.
For more detail, see Export your 3D model and Supported file formats.
A 3D model viewer lets you open a model file, rotate around it, zoom in, and inspect the shape in a browser. For architectural work, viewing the model is only part of the job. You usually also need to decide where the camera belongs, how the model should sit in context, and which views are worth rendering.
Render a House 3D Preview turns the model-viewing step into a rendering handoff: upload a supported file, set up the scene, save useful perspectives, and render those saved views into architectural images.
Check massing, orientation, materials, and import quality before choosing the render view.
Use model-and-scene context when a flat screenshot is not enough for the presentation story.
Keep repeatable viewpoints as project Perspectives instead of rebuilding each angle manually.
Use your source software for exact production data and Render a House for visual render workflow.
A 3D model viewer lets you open and navigate a 3D file in an interactive view. In Render a House, the viewer is part of 3D Preview, so you can also place the model in site context, save camera perspectives, and use those views as the base for architectural renders.
Render a House 3D Preview accepts GLB, GLTF, and OBJ files. GLB is usually the simplest option because it keeps the model data together in one file.
No. Native SKP, RVT, DWG, DXF, IFC, and similar CAD/BIM files are not direct uploads for this viewer page. Export a supported GLB, GLTF, or OBJ file first, then upload that file into 3D Preview.
No. This page is for viewing, positioning, saving perspectives, and rendering from supported models. It does not convert files between 3D formats or export a corrected production model.
No. Use the source CAD, BIM, or modeling software for exact measurements, dimensions, quantities, and construction checks. Render a House is for visualization and rendering workflow.
Yes. Save a camera angle as a Perspective, then continue into the normal render settings. The saved 3D scene view becomes the base image for the architectural render.
No. The 3D model viewer uses a model you already have, such as a GLB, GLTF, or OBJ file. The AI 3D model generator is a separate image-to-model workflow for creating a GLB from a clear object image.
Use 3D Preview when camera control, site context, or multiple repeatable views matter. Upload a flat image when you only need a fast one-off render from a sketch, floor plan, screenshot, or existing view.
Start free, then choose the monthly credit allowance that fits your rendering and refinement workload. Annual billing is also available.
$0forever
Try Render a House before choosing a paid plan.
$39per month
For professionals and small teams preparing more views.
$99per month
For studios with higher-volume visualization workflow.
Prices are shown in USD. The signed-in pricing page shows the current checkout terms before purchase.
Create a downloadable GLB from a clear object image before using it elsewhere.
Start from a PNG or JPEG floor plan when you do not have a 3D model yet.
Export a SketchUp model to GLB, GLTF, or OBJ before using it in 3D Preview.
Read the full guide for import, positioning, navigation, saved perspectives, and rendering.
Ready when your model is