
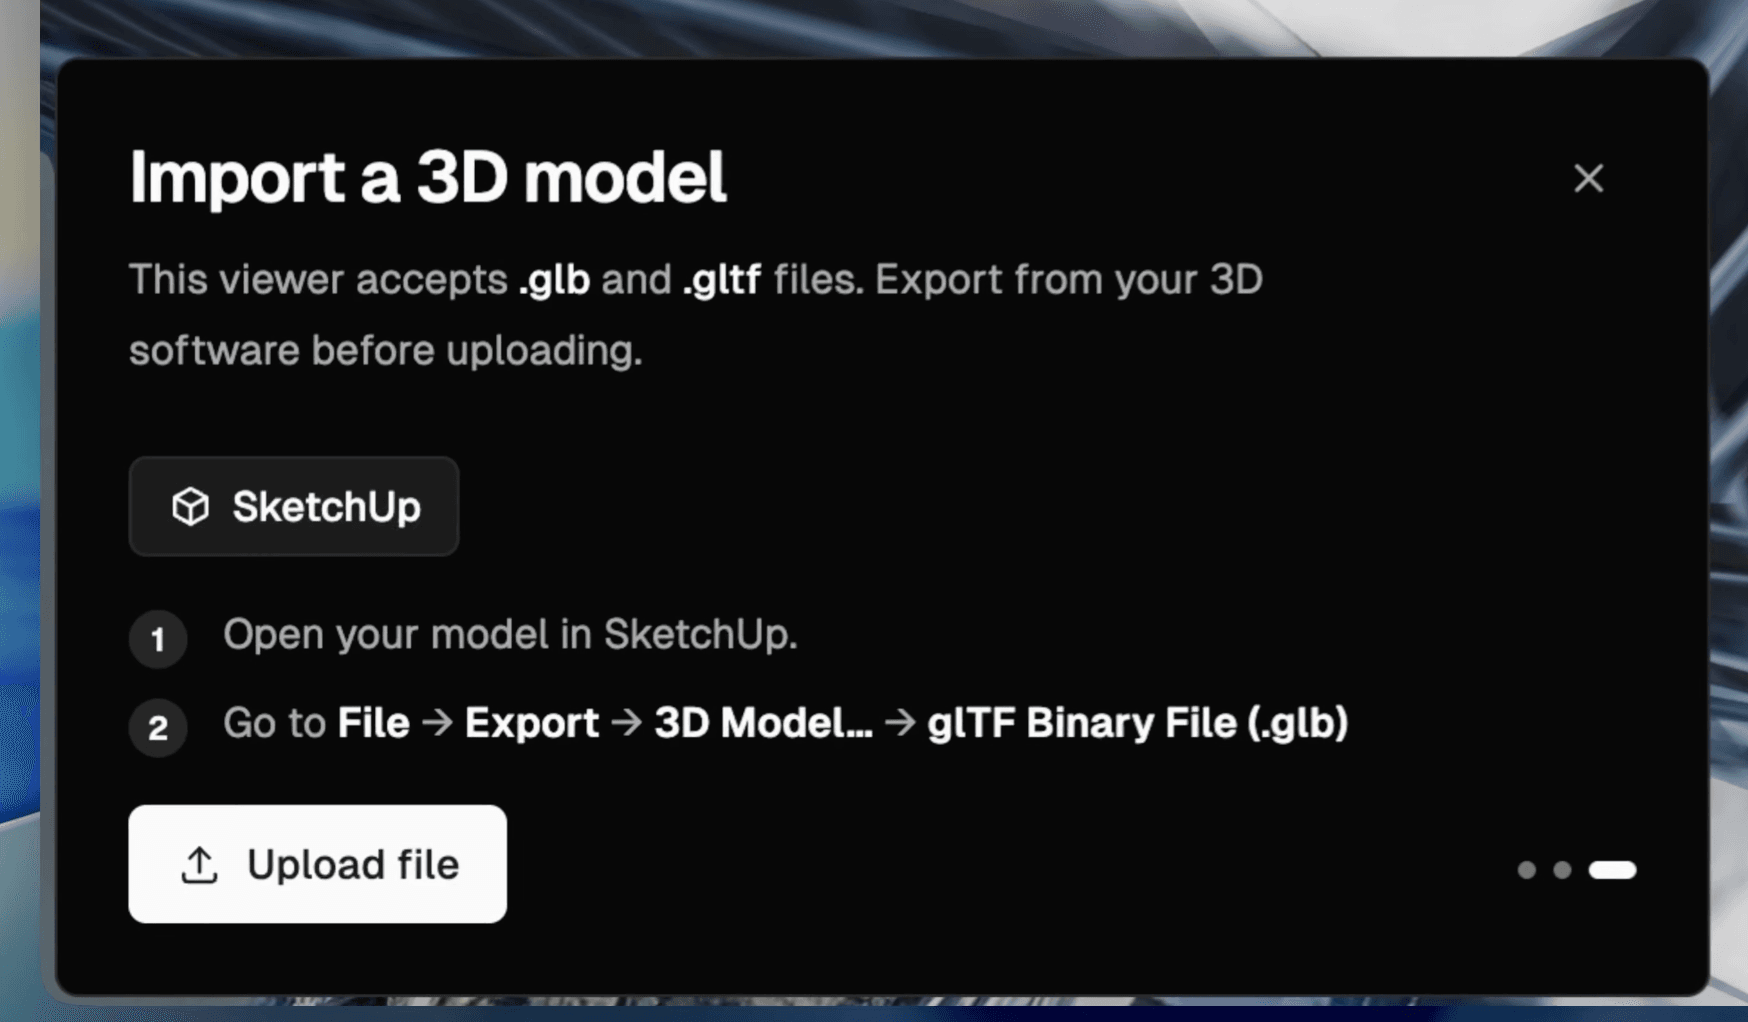
Export
Prepare a supported model
Start outside Render a House by exporting the source Revit or AutoCAD work to GLB, GLTF, or OBJ.
Bring an exported Revit or AutoCAD model into Render a House, view it in 3D, place it in visual context, save camera views, and turn those views into polished architectural renders.
Render a House is not a native RVT, DWG, or BIM file opener. Export your model to GLB, GLTF, or OBJ first, then use 3D Preview for presentation views and render handoff.
Revit viewer workflow
Use this workflow when a design already exists in Revit, AutoCAD, or another architecture modeling tool and you need a faster presentation path than static screenshots alone.
Export
Start outside Render a House by exporting the source Revit or AutoCAD work to GLB, GLTF, or OBJ.
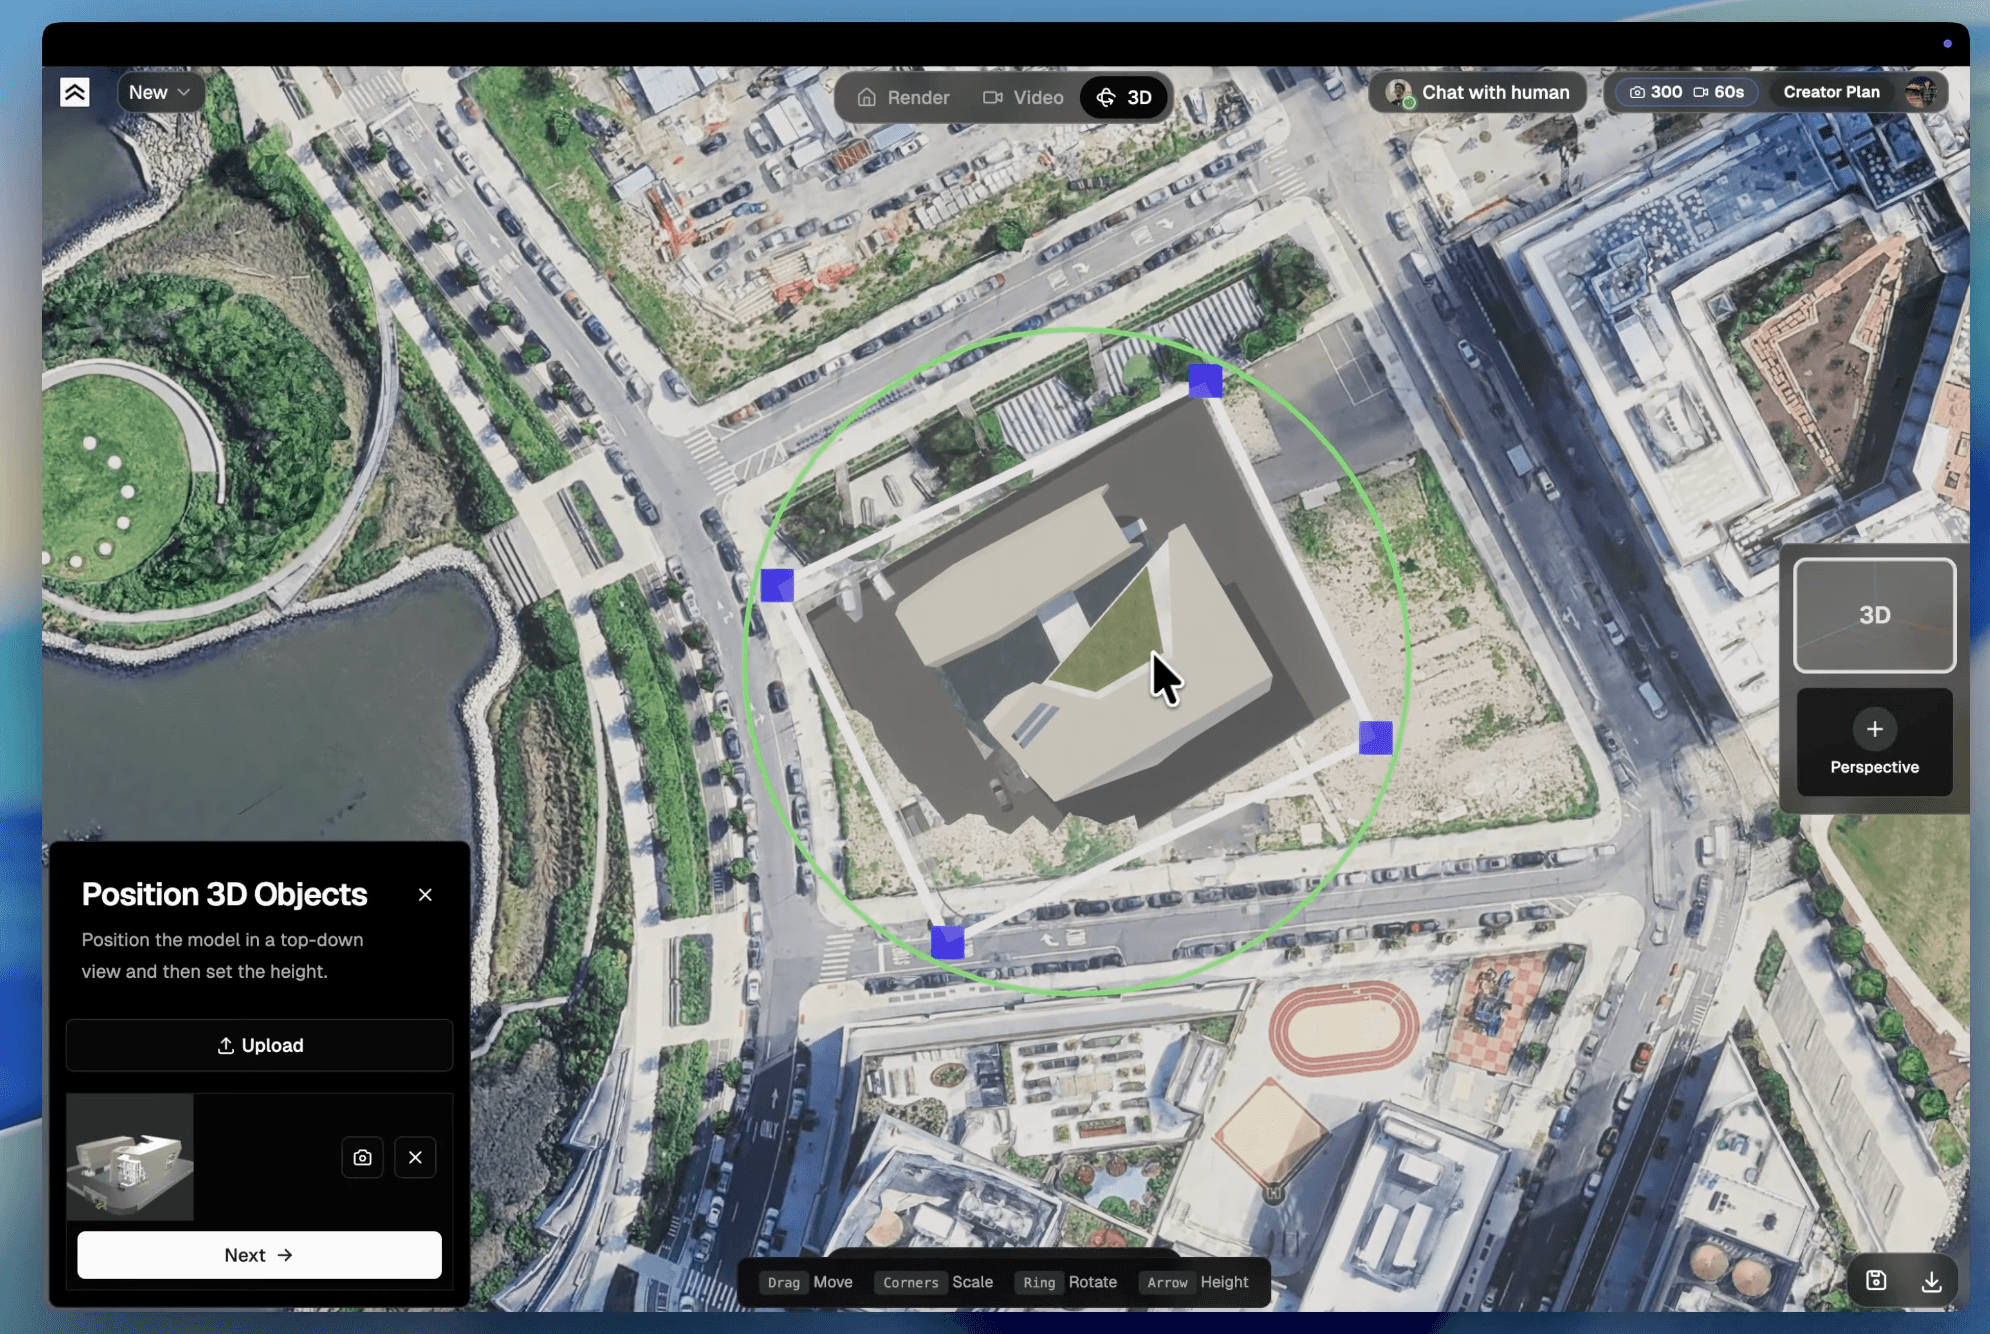
Place
Move, rotate, scale, or raise the exported model until the visual placement works for the view.
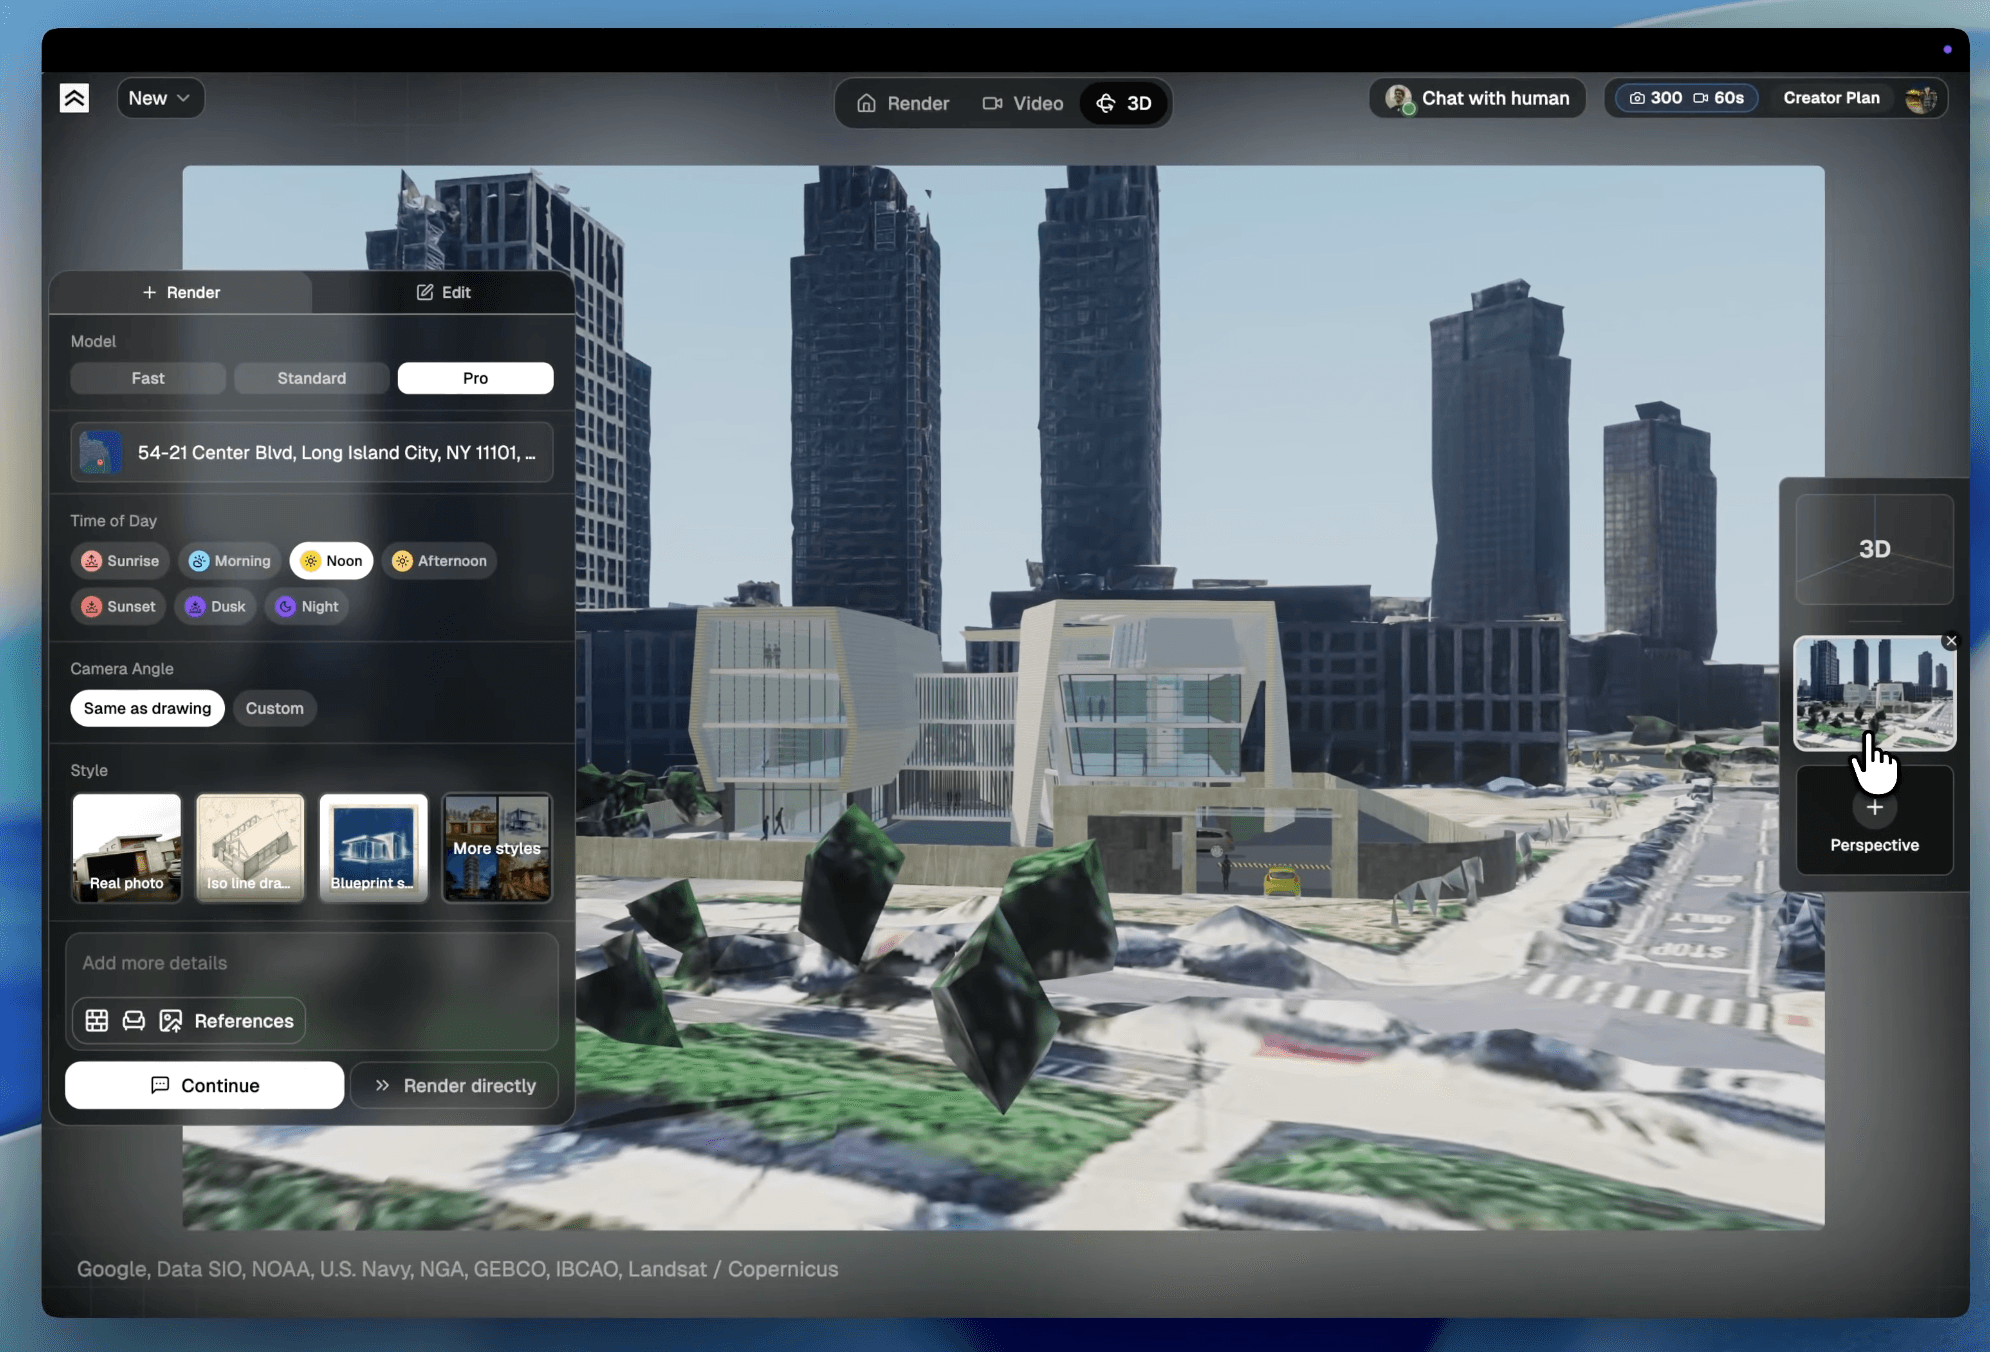
Render
Save useful camera angles as Perspectives, then continue into render settings from each saved view.
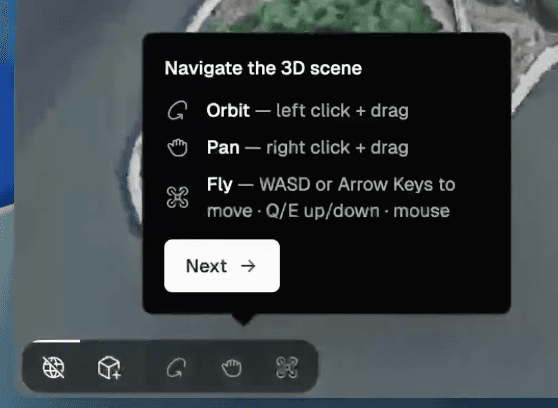
Orbit, pan, or fly through the scene to decide which views explain the project clearly before spending time on final image direction.

Start in Revit, AutoCAD, or your modeling software. Create a clean GLB, GLTF, or OBJ export using the exporter your team trusts.
Start a new Render a House 3D scene and upload the exported model. The uploaded model stays navigable instead of becoming one flat screenshot.
Use map-based site context when it helps the presentation, or keep the scene neutral for interiors, massing studies, and standalone views.
Move, scale, rotate, and height-adjust the model for the presentation scene. This is not a survey or construction validation workflow.
Orbit for exterior passes, pan for framing, and fly through a street, courtyard, entry path, or interior-feeling view.
Save each useful angle as a Perspective so one exported model can support a hero view, aerial view, detail view, or option set.
Continue into render settings, choose the visual direction, and keep geometry-sensitive requests close to the saved 3D view.
3D Preview accepts web-ready model exports, not native CAD or BIM project files. If your source is RVT, DWG, DXF, SKP, IFC, or another authoring format, prepare a supported model export before you upload it to Render a House.
Best for: Most Revit, SketchUp, Rhino, or Blender handoffs after export
Recommended because model data and textures can travel together in one binary glTF file.
Best for: glTF workflows where files are managed together
Works when your export keeps the related material and texture assets with the model.
Best for: Classic 3D model exchange
Useful for geometry handoffs; review materials after import because textures can need extra care.
For more detail, see Export your 3D model, Supported file formats, and the 3D Preview guide.
A native Revit viewer is the right place to inspect RVT files, sheets, model properties, and technical details. Render a House fits after that work: export a supported model, set up the visual scene, save the camera angles, and create render images that are easier to review in a meeting, listing, deck, or design conversation.
Use Revit, AutoCAD, Autodesk Viewer, or a BIM platform for native files, sheets, properties, dimensions, and coordination.
Use a GLB, GLTF, or OBJ export when you want browser navigation, site context, and saved presentation cameras.
Place the model in a scene when surroundings, approach angles, or massing views matter more than a raw modeling viewport.
Keep production decisions in the source software and use Render a House for visual render workflow after export.
Hide drafting helpers, temporary objects, and model clutter before export so the browser view stays focused.
A single file with embedded textures is usually easier to upload, move around, and review with fewer missing-material surprises.
Very dense meshes can slow browser viewing. Simplify detail that does not affect the presentation view.
Use names like north-facade-review.glb or main-house-concept.obj so projects remain easy to scan later.
A single exported model can support a hero shot, pedestrian view, aerial view, and material detail without another upload.
Mention material palette, time of day, mood, and what should remain close to the uploaded model.
Not directly. Export the Revit model to GLB, GLTF, or OBJ first, then upload the exported model into 3D Preview.
Not as a native CAD file. For 2D drawings, export a clean PNG or JPEG. For a 3D model workflow, export the model to GLB, GLTF, or OBJ before uploading it to Render a House.
GLB is usually the simplest choice because it keeps the model and textures together in one file. GLTF and OBJ can also work, but textures and related assets may need more care depending on how the model was exported.
Yes. Import the exported model once, move through the 3D scene, and save each useful camera angle as its own Perspective. Each Perspective can then become its own render.
No. Those tools are better for native RVT viewing, technical review, model properties, sheets, measurements, and coordination. Render a House is for visual context, saved presentation views, and render generation after you have exported a supported 3D file.
Yes. In 3D Preview, you can set an address or map pin, place your model in visual site context, and save camera views from that scene. You can also skip the map when site context is not needed.
Start free, then choose the monthly credit allowance that fits your rendering and refinement workload. Annual billing is also available.
$0forever
Try Render a House before choosing a paid plan.
$39per month
For professionals and small teams preparing more views.
$99per month
For studios with higher-volume visualization workflow.
Prices are shown in USD. The signed-in pricing page shows the current checkout terms before purchase.
Start a broader render workflow from a sketch, floor plan, photo, or exported 3D model.
Start from a PNG or JPEG floor plan when you do not have an exported 3D model yet.
Use the same GLB, GLTF, or OBJ handoff when a SketchUp model needs render-ready views.
Read the full guide for import, positioning, navigation, saved perspectives, and rendering.
Ready when your export is