360° renders
Capture your 3D scene as an immersive 360° panorama and render it with AI, then drag to look around in any direction.
360° renders turn a viewpoint in your 3D scene into a fully immersive panorama. Instead of a single framed shot, the AI renders the entire surround — floor to sky, all the way around — so you can drag to look in any direction, as if standing inside the render.
📺 Prefer to watch? See this step in the walkthrough on YouTube: Render con cámaras realistas + recorrido 360 (in Spanish, from 3:05).
Before you start
360° renders are captured from inside a 3D scene, so you need a 3D Preview project with your model placed on the terrain. If you haven't set that up yet, follow 3D Preview first — it walks through importing your model, positioning it on the map, and opening the 3D scene.
1. Explore the 3D scene
Move the camera to the spot you want to render from. A 360° panorama captures everything around the camera, so what matters is the position — the direction you face only sets where the view is centered when it first loads.
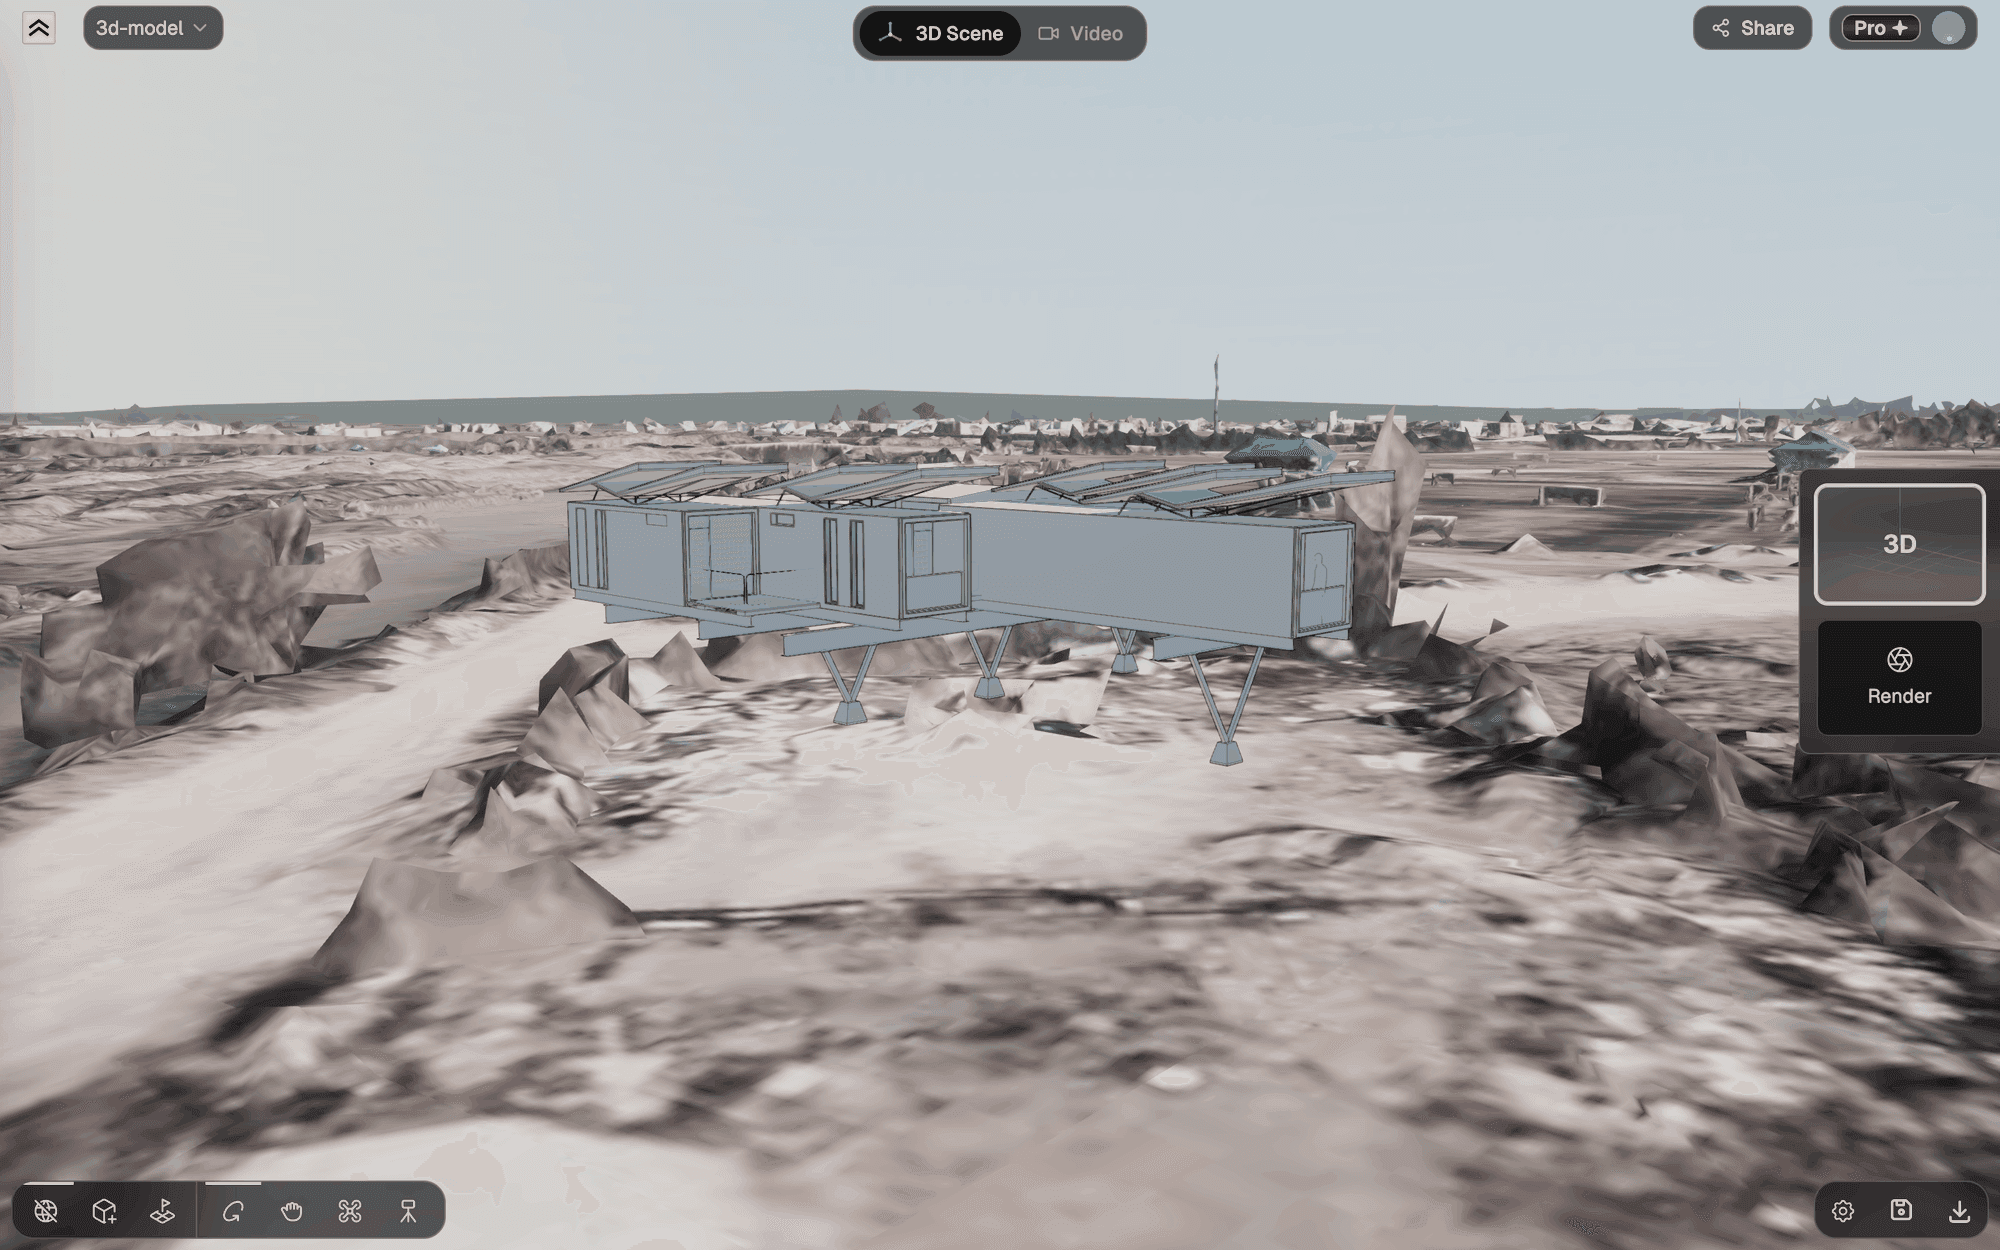
- Orbit — left click + drag, to swing around the model.
- Pan — Shift + left click + drag, to slide sideways.
- Fly — WASD / Arrow Keys to move, Q / E for up / down, mouse to look.
- Tripod — click a spot on the floor and the camera stands there at eye height (1.60 m). The quickest way to place it inside a room or courtyard. See the tripod.
Interior spots and courtyards make the most of 360° — you're standing in the middle of the scene and can look every way. For a deeper tour of the navigation modes, see 3D Preview.
2. Choose the 360 lens
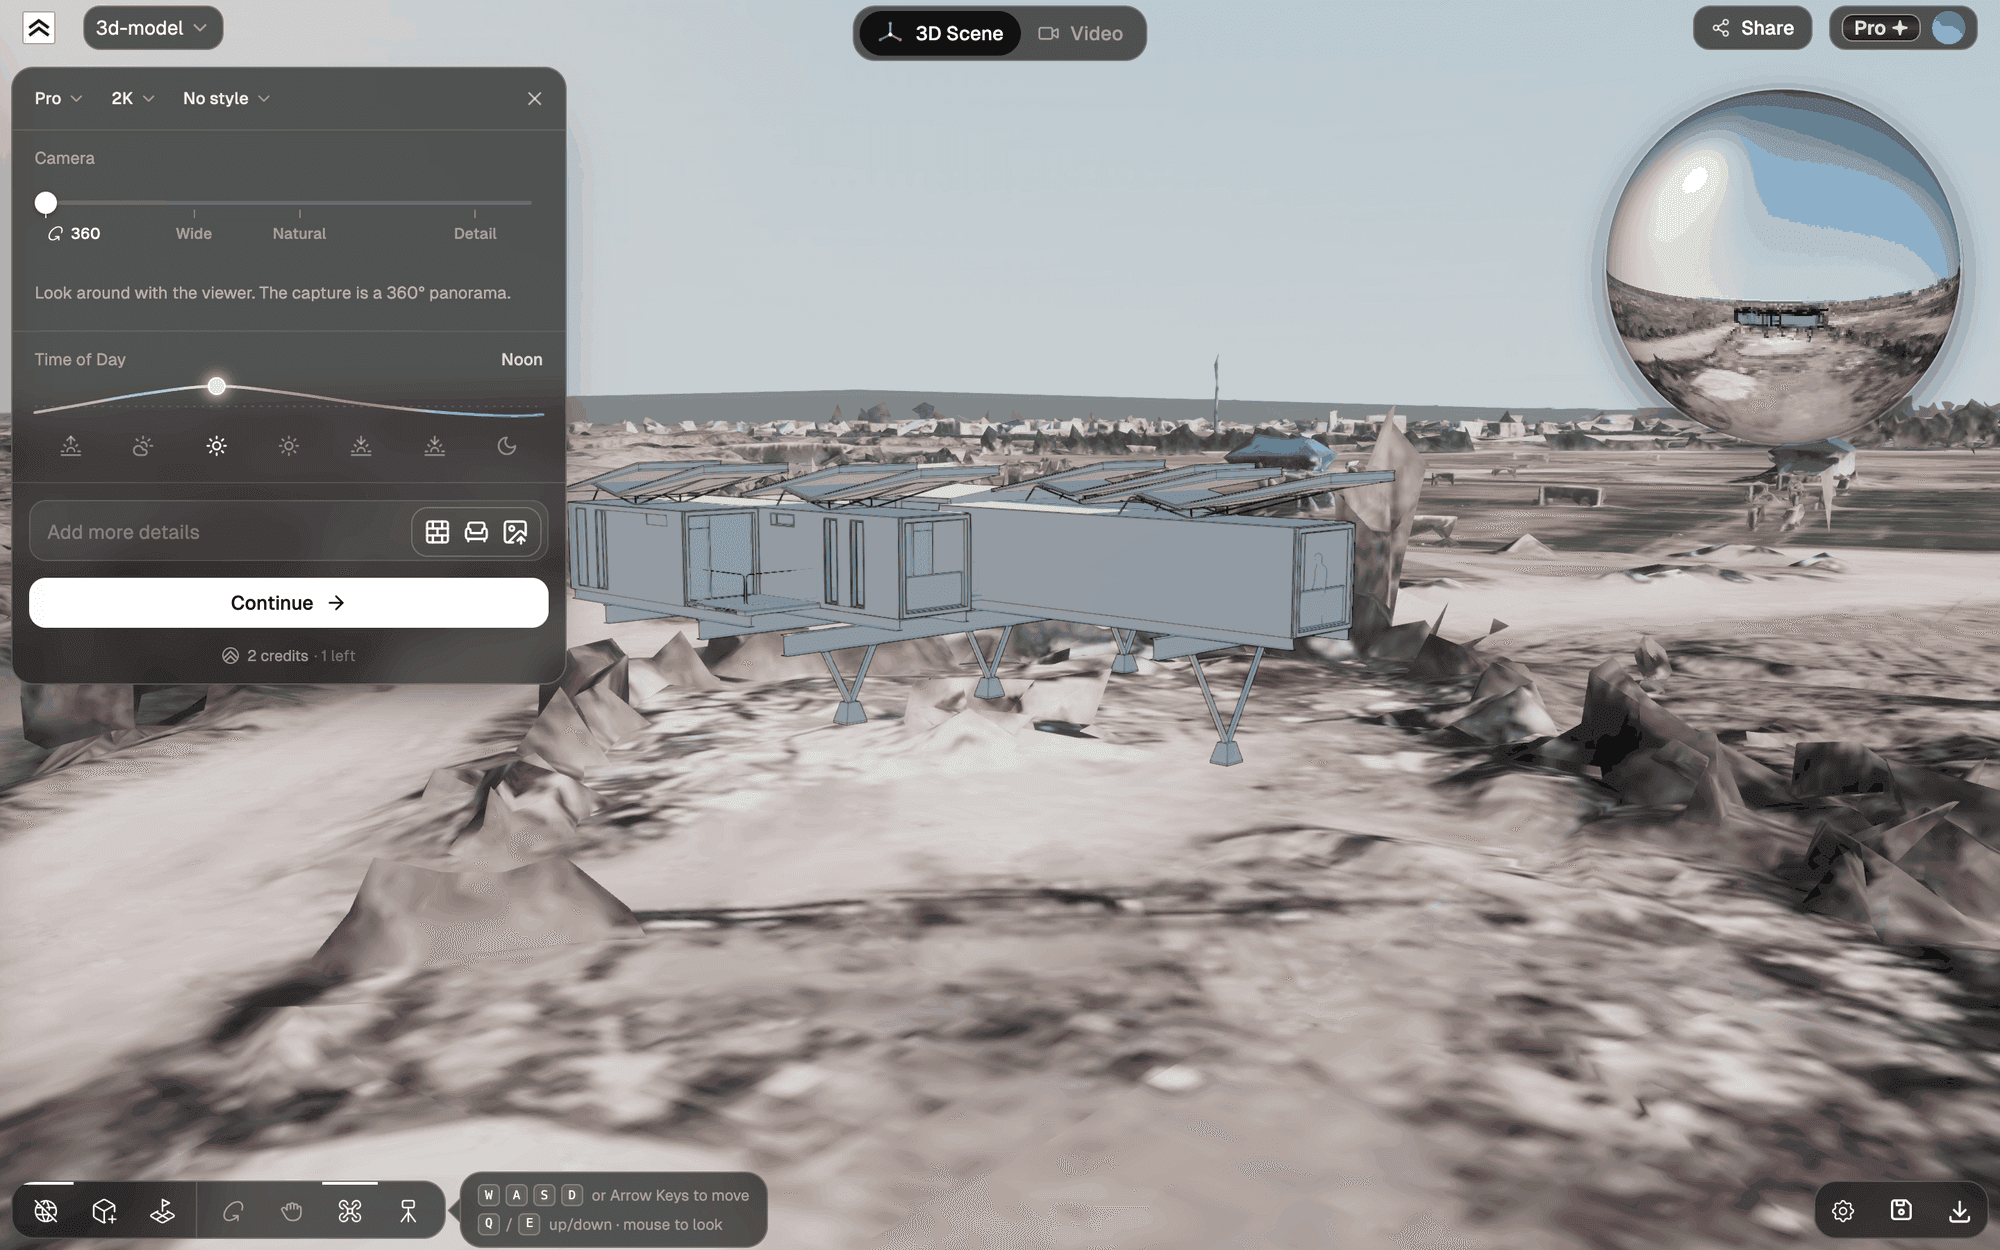
Click Render on the right dock. This opens Set up the shot. In the Camera block, pick 360, the first stop of the lens track. There's no frame in 360: drag the view to look around, keep moving with WASD to find your spot, and check the globe in the top-right corner, which previews the whole surround from where you stand. Pick another lens to go back to a normal shot.
3. Configure the render
The rest of the panel is the same as for any other shot (model, resolution, location and Copy camera). The settings that matter most for a 360°:
- Time of Day — sets the lighting and shadow direction across the whole surround.
- Style — Real photo, or one of the style presets, applied all the way around. See Choose a style for the full list.
- References — optional mood, material, or style references.
4. Refine with AI and render
Click Continue: the viewpoint is captured as a full panorama and saved as a new perspective in your project, which shows up in the right dock. Each one is its own view with its own render history. The chat assistant then walks you through a few quick questions, just like a normal render. Describe any changes you want — materials, mood, vegetation, finishes — then generate.
The AI takes the captured panorama as its base and restyles the entire surround into a photorealistic 360°, keeping the geometry of your scene intact. Renders usually take a bit longer than a flat shot because there's a full sphere to paint.
You can keep refining afterwards — each new render is added to the perspective's history, and you can compare it against the original captured scene. The editing toolbar (Enhance, compare, variations, and more) works here too, except Select, which isn't available on 360° views — see Refine and Iterate.
5. Explore the immersive result
When the render is ready it opens in the immersive viewer:
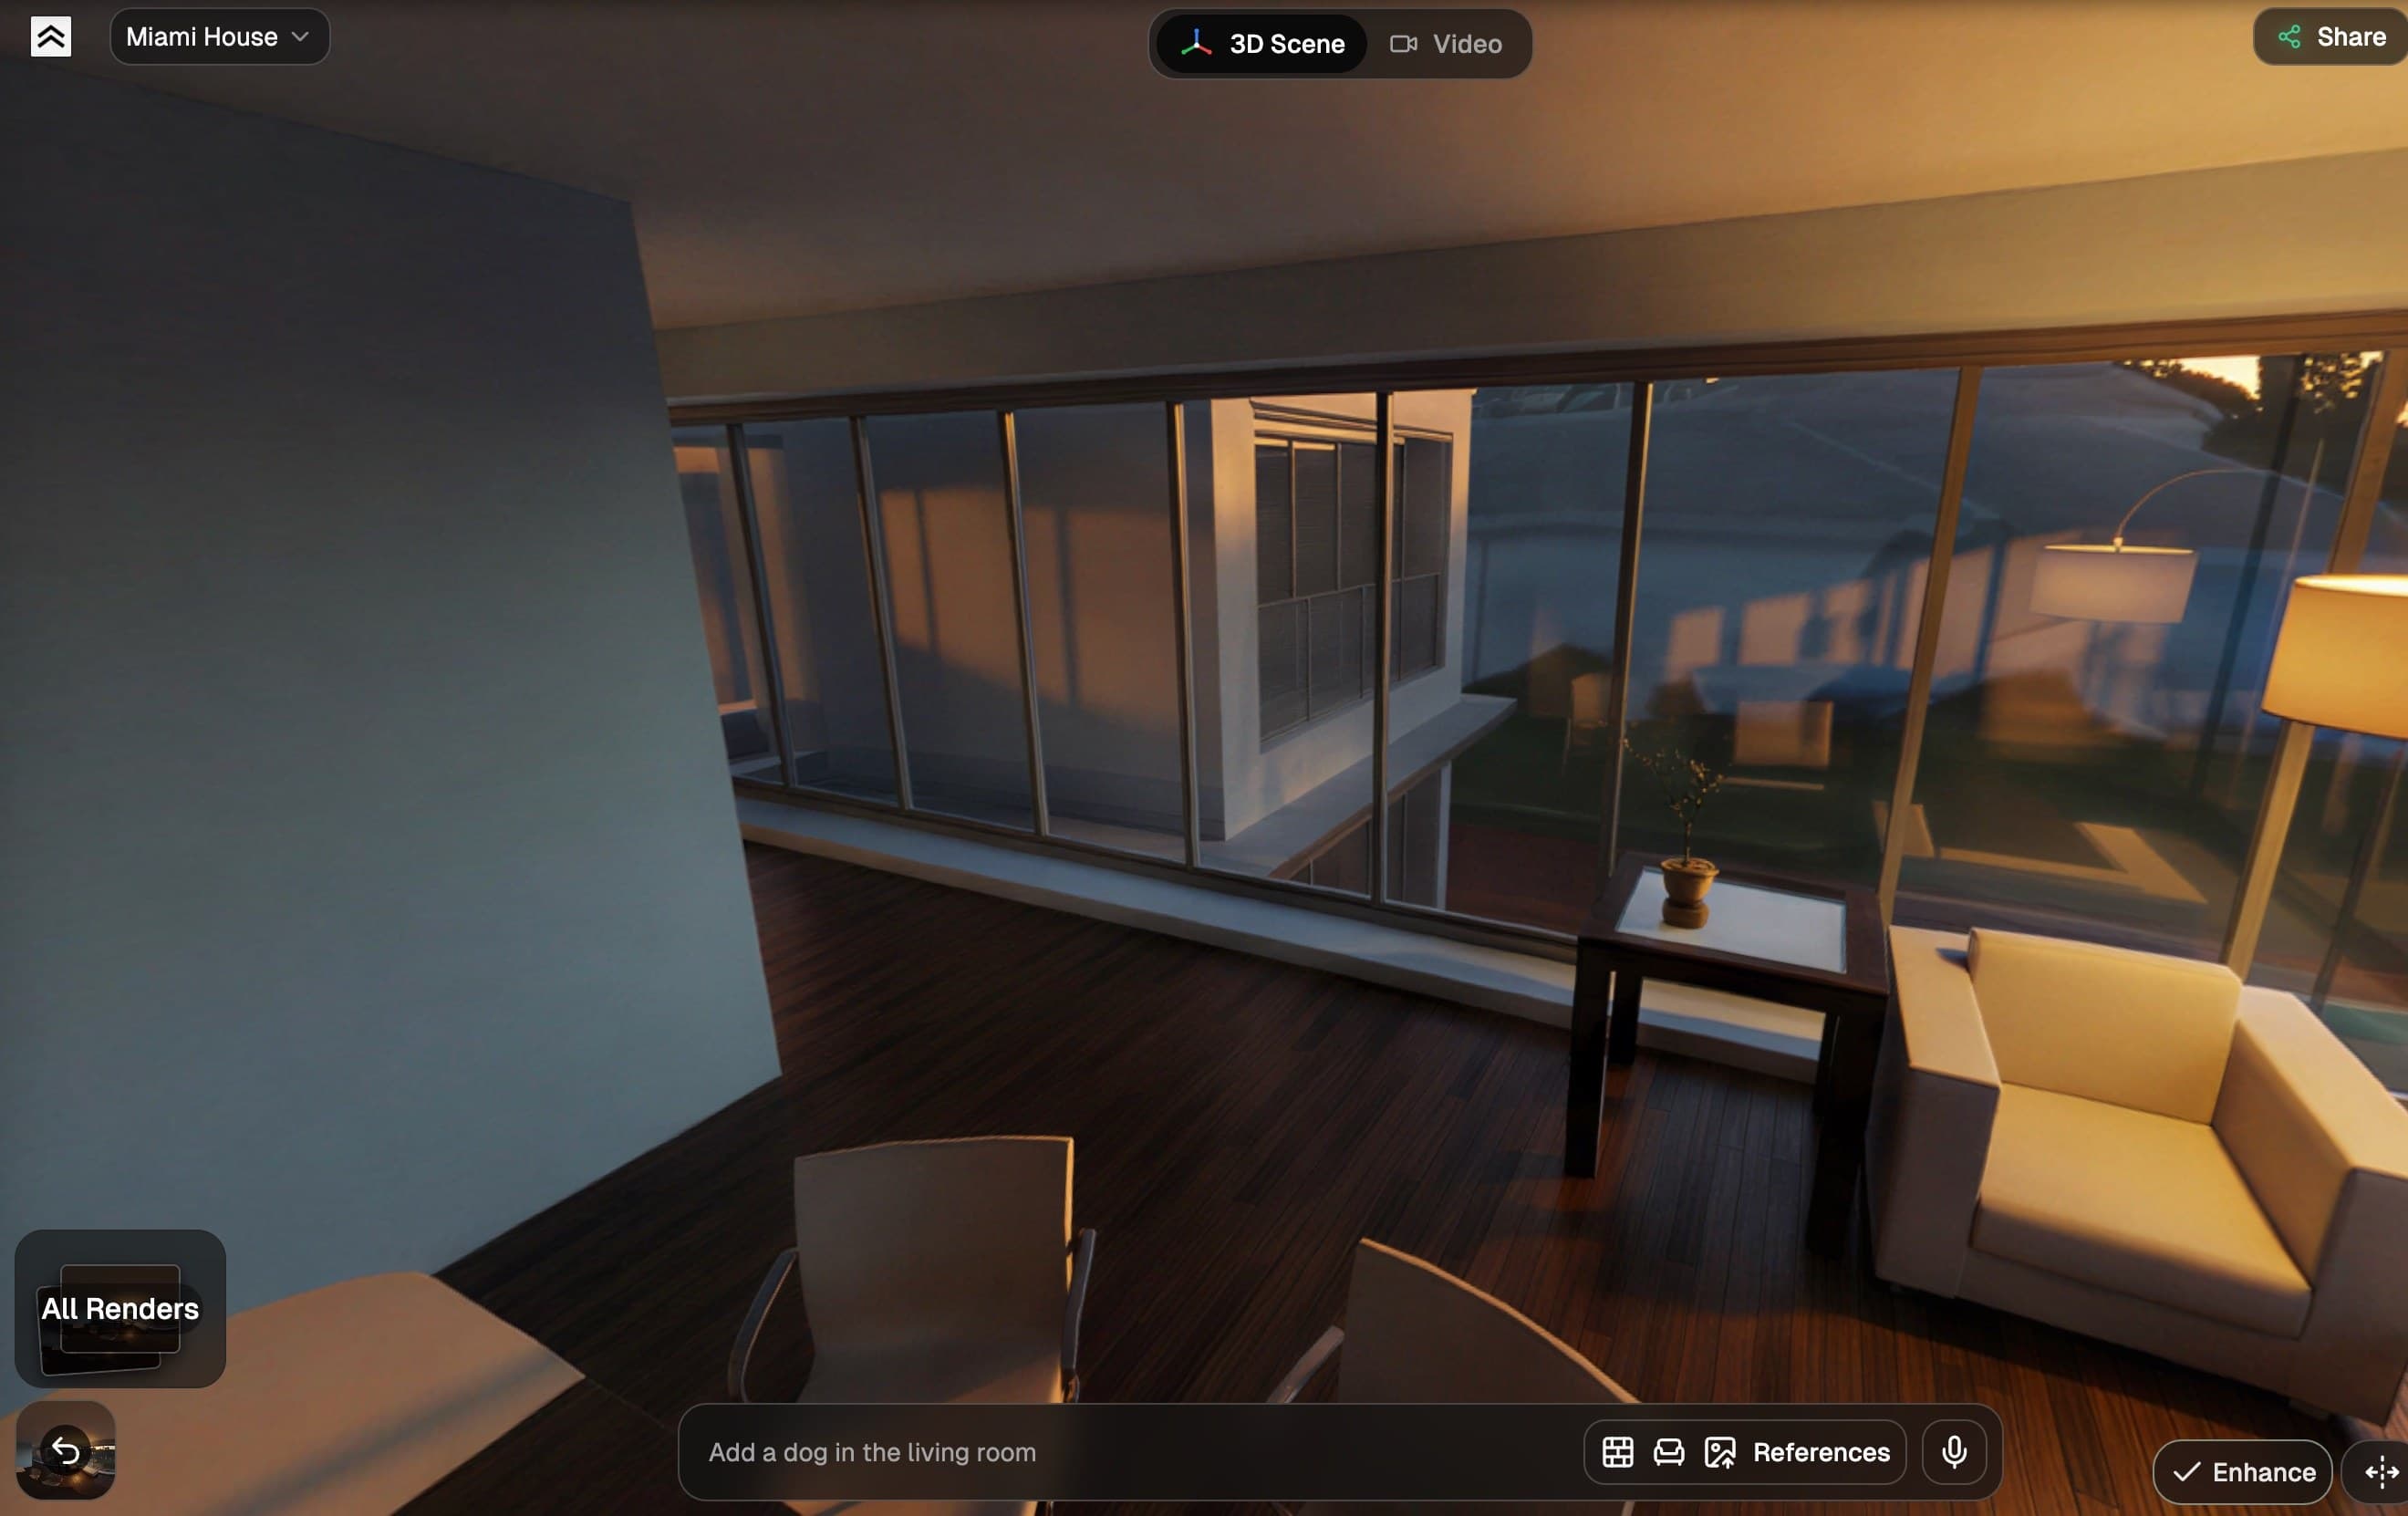
- Drag to look around — left / right to turn, up / down to tilt.
- Scroll or pinch to zoom in and out.
- The view glides with a bit of momentum, so a quick flick keeps panning after you let go.
It's the closest thing to standing inside your design — walk your eye along a façade, glance up at the sky, or turn to take in the surroundings. Jump back into the 3D scene anytime with the 3D tile at the top of the dock to capture another panorama from a different spot.
Tips
- Stand inside the scene. 360° shines from an interior room, a courtyard, or street level — anywhere you're surrounded by the design. A far-away overview wastes most of the sphere on empty sky.
- Eye level gives the most natural "you are here" feel: the tripod puts the camera at 1.60 m in one click.
- Try sunset or dusk for the most dramatic light — it wraps warm color across the whole panorama.
- Save several panoramas per project — each is its own perspective with its own render history, so you can capture different rooms or spots without re-importing anything.
What's next
- 3D Preview — set up the 3D scene 360° renders are captured from
- Choose a style — style presets for your render
- Refine and Iterate — keep editing after the first render
- Projects and Views — how perspectives are organized