November update
Set up the shot with format, lens, and tripod before rendering, then let the assistant check every render and redo it for free if it came out wrong.
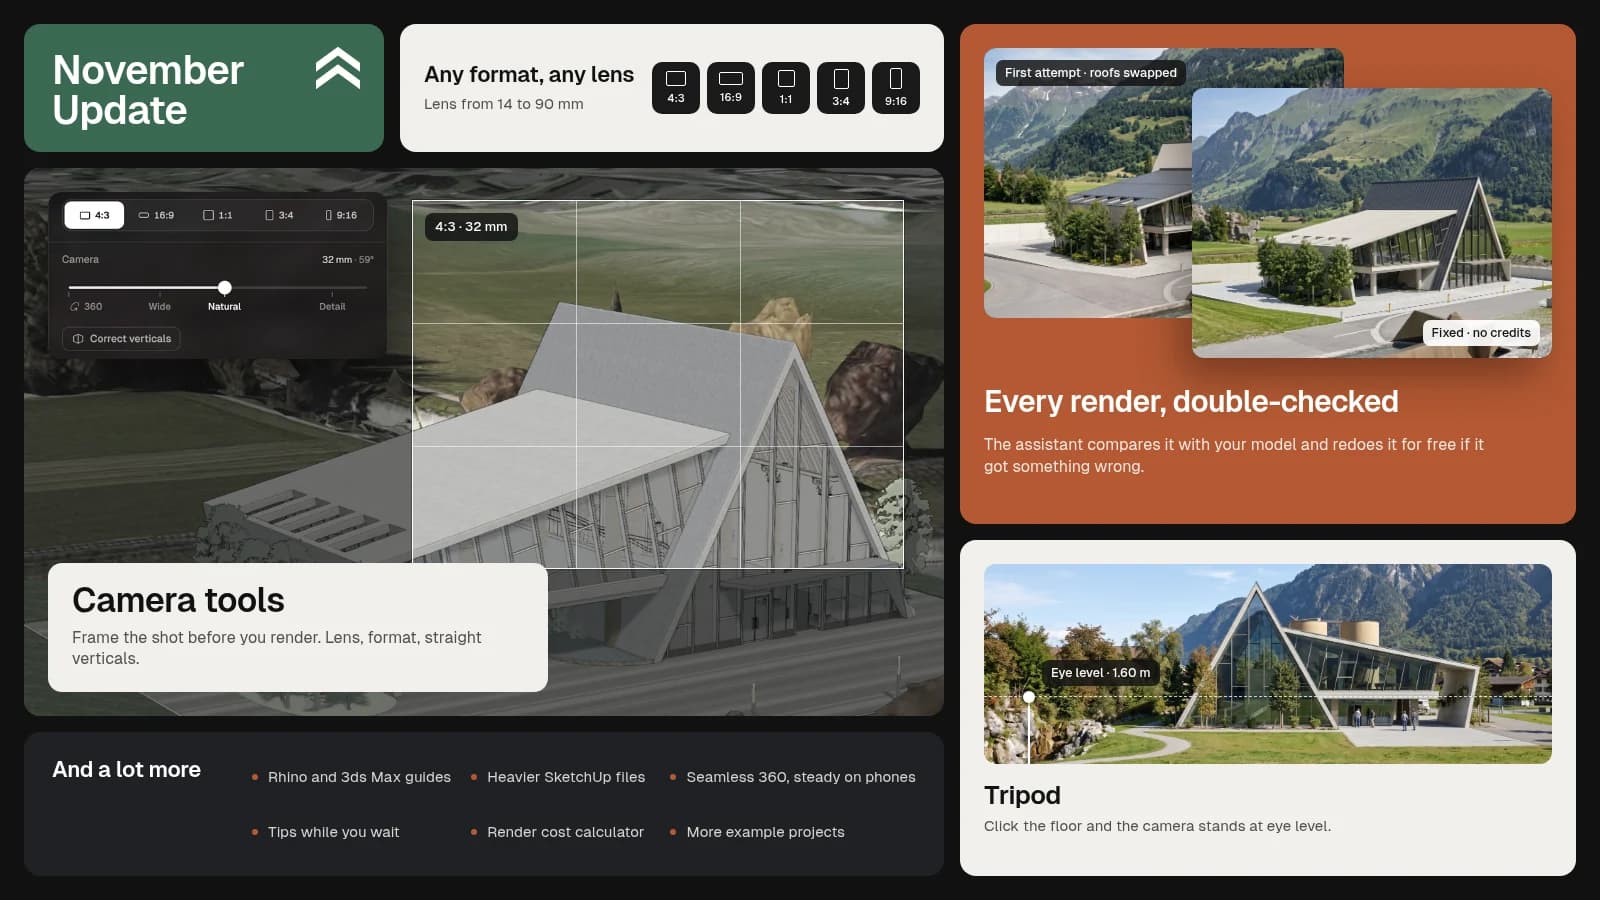
Set up the shot before you render
Until now, clicking Render captured the 3D view right away. Now it opens shot setup: the view stays live, with a frame and rule-of-thirds grid over it, so you can adjust everything the way a photographer would before taking a shot.
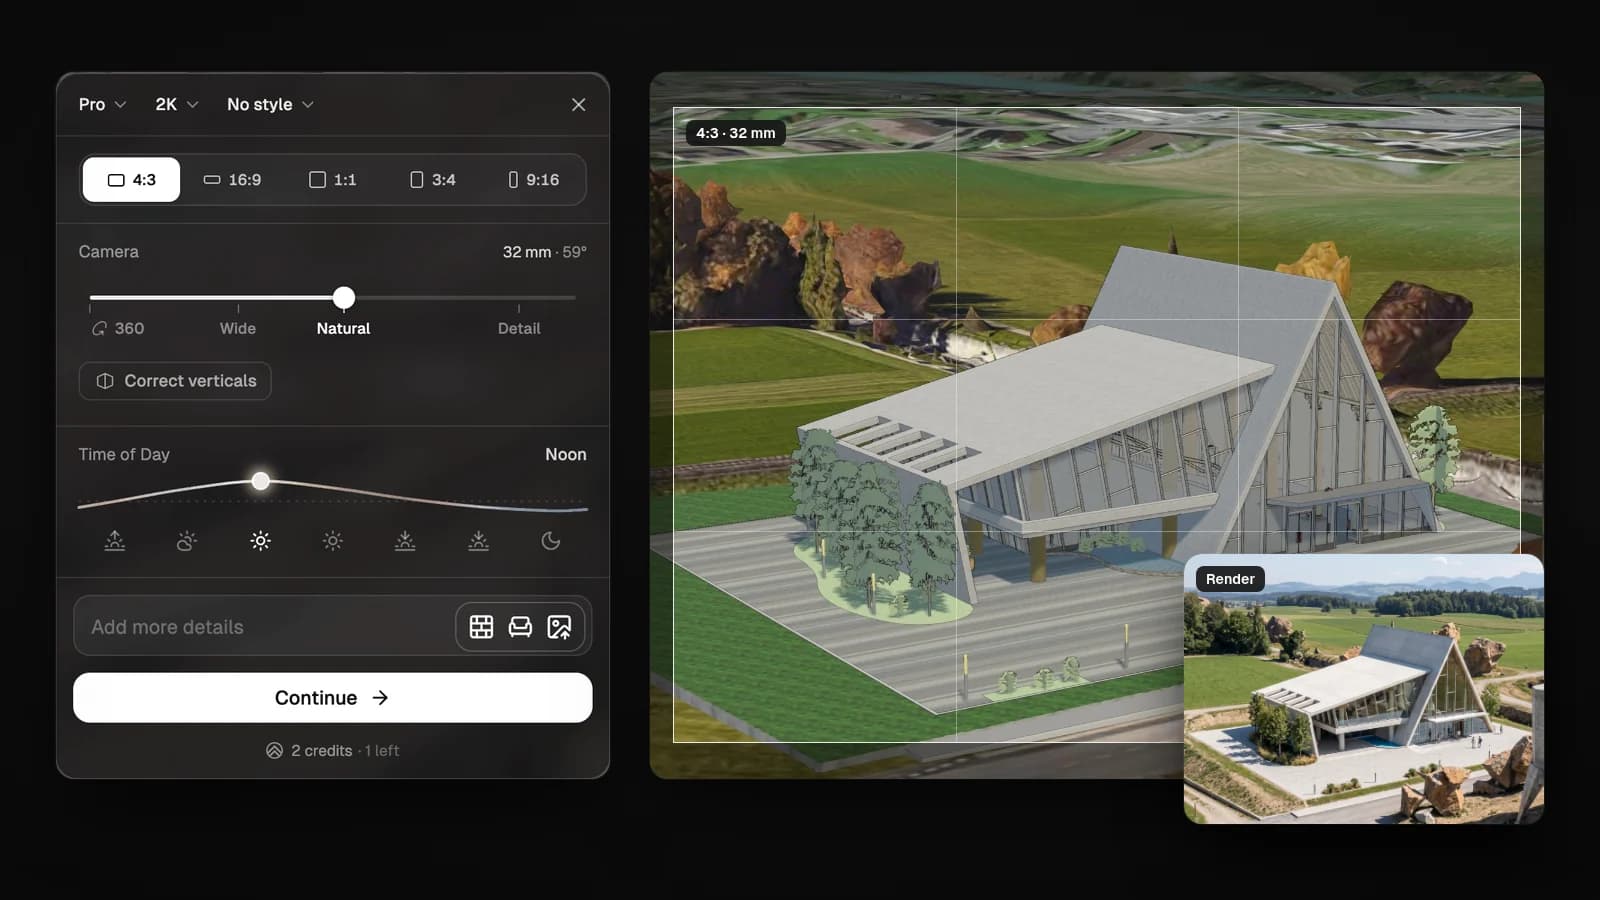
- Format. 4:3, 16:9, 1:1, 3:4, or 9:16. The frame shows you exactly what will fit in the image.
- Lens. From 14 to 90 mm, with shortcuts for Wide, Natural, and Detail. Changing the lens never moves the camera, and 360 is in the same control.
- Correct verticals. The building's walls stay parallel even when the camera points up or down.
- Tripod. Click the floor and the camera stands there at 1.60 m, at eye level.
All the details in 3D Preview.
Every render, checked before you see it
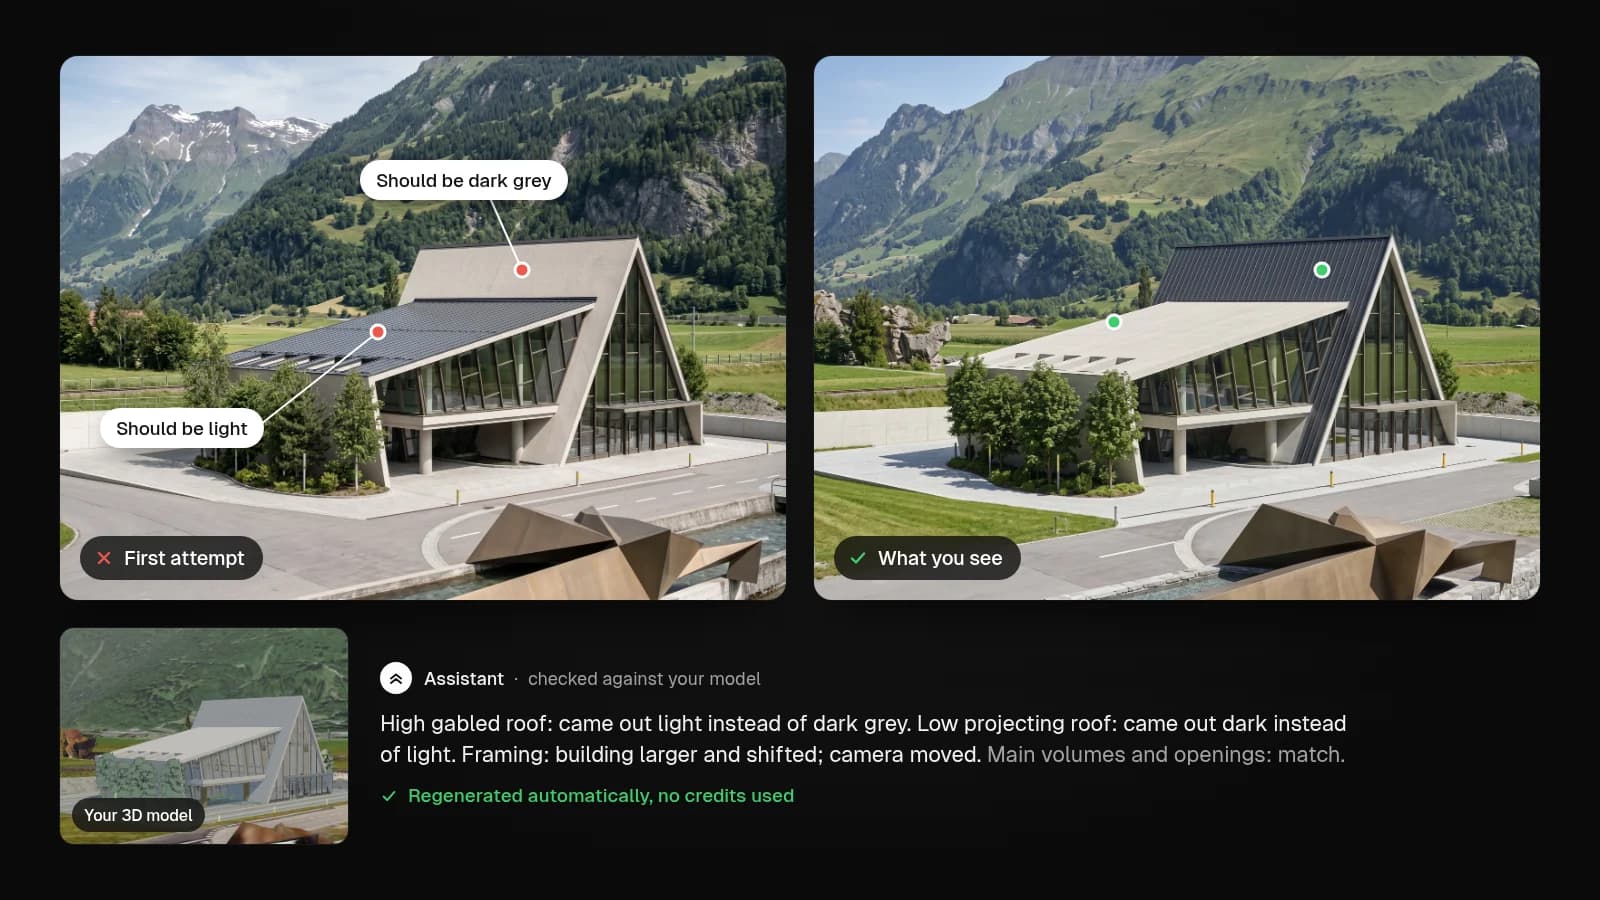
The assistant now checks every render before showing it to you and compares it with your model. If the camera moved, the geometry changed, or the materials don't match, it generates a new one automatically without charging credits.
In this example, the first attempt switched the roofs (the taller one came out light and the shorter one dark) and shifted the camera. The assistant caught it and made a new render, so what you see is the corrected version.
And if something still doesn't look right, tap 👎 next to the render, tell us what went wrong, and it'll be regenerated for free. Every render comes with 2 free regenerations, shared between the automatic ones and the ones you request.
We also changed how the assistant talks to you: it's more direct and approachable now.
Also
- Guides for Rhino and 3ds Max. The import dialog walks you through exporting from each one, step by step. Find them in Export your 3D model.
- Larger SketchUp files. Large
.skpfiles no longer run out of memory during import. - Seamless 360. The panorama seam is no longer visible, and the viewer stays stable with your phone upright.
- Tips while you wait. While your render is generating, we'll show you ways to get more out of it.
- Cost calculator. Estimate the cost of an architectural render with the calculator.
- More sample projects. There are now several sample projects to explore before you upload your own.
For every change, day by day, see the changelog.